Brown Butter Biscoff Rice Krispie Treats


These Brown Butter Biscoff Rice Krispie Treats are the ultimate upgrade with nutty brown butter, creamy Biscoff, and flaky salt. Get the easy no-bake recipe that disappea
Continue the meal with Double-Crusted Plum Crisp, Brown Butter Pear Crisp, Chocolate Rice Krispie Treats, and Peach Crisp.
Why These Brown Butter Biscoff Rice Krispie Treats Stand Out
I first made these for a fall get-together and they disappeared faster than anything else on the table. Browning the butter adds a nutty, toasty depth that plain butter just can’t match, while Biscoff cookie butter brings a warm, spiced sweetness. The extra handful of marshmallows stirred in at the end keeps every bite gooey, and a sprinkle of flaky sea salt cuts the richness. It’s a simple upgrade that makes a classic feel brand new.
What Makes These Brown Butter Biscoff Rice Krispie Treats So Good
- Brown butter adds nutty depth, Taking the extra few minutes to brown the butter transforms the flavor from plain to rich and toasty, without any extra effort.
- Biscoff cookie butter brings creamy spice, Swirling in that smooth, speculoos‑flavored spread gives the treats a unique caramelized taste that pairs perfectly with crispy rice.
- Extra marshmallows keep them chewy, Stirring in a second cup of mini marshmallows at the end creates pockets of melted goo, so every bite is soft and tender.
Key Ingredients for Chewy Rice Krispie Treats with Biscoff
- Unsalted butter, Browning the butter is essential for the nutty flavor. Use unsalted so you can control the salt level; the recipe adds sea salt separately.
- Biscoff cookie butter, Look for the creamy version, not the crunchy. It melts smoothly into the marshmallow mixture and gives that signature speculoos taste.
- Mini marshmallows, Fresh, soft mini marshmallows melt quickly and evenly. Stale or hard marshmallows won’t melt as well and can make the bars less gooey. The second cup stirred in at the end ensures pockets of melted marshmallow.
Kitchen Tools for Brown Butter Biscoff Rice Krispie Treats
- Large pot or Dutch oven (for melting butter and marshmallows)
- 9×9-inch pan (for thick bars) or 9×13-inch pan (for regular bars)
- Parchment paper (optional, for easy removal)
- Rubber spatula (greased for pressing)
Tips for Making Perfect Brown Butter Biscoff Rice Krispie Treats
When you transfer the mixture to the pan, use a greased spatula or lightly oiled hands to press it in. Press evenly but gently, pressing too hard will make the bars hard and dry. For easy removal, line the pan with parchment paper; you can lift the whole slab out and cut clean squares.
Let the treats sit for at least an hour before cutting. This gives the marshmallows time to set so you get clean edges. If you cut too soon, they’ll be sticky and messy.
Techniques for the Best Biscoff Rice Krispie Treats
Browning butter requires attention: melt the butter over medium heat, stirring often. It will foam, then the milk solids will turn golden and smell nutty, about 5 minutes. Take it off the heat as soon as it reaches that color, because it can burn quickly.
Stir the Biscoff cookie butter in after you remove the pot from the heat. If you add it while the marshmallows are still on the burner, the heat can cause the cookie butter to separate or scorch. Fold the Rice Krispies and chopped Biscoff cookies in gently, just until evenly coated, to keep the cereal from crushing.
Easy Variations for Cookie Butter Rice Krispie Treats
If you don’t have Biscoff cookie butter, smooth peanut butter or Nutella work well, just note the flavor will change. For a different crunch, substitute the Biscoff cookies with crushed graham crackers or shortbread. To make these gluten‑free, swap the crispy rice cereal for a certified gluten‑free version and replace the Biscoff cookies with a gluten‑free speculoos cookie or omit them. You can also add ½ cup of mini chocolate chips along with the final marshmallows for extra chocolaty pockets.
How to Serve and Enjoy These Brown Butter Biscoff Rice Krispie Treats
Serve the bars at room temperature alongside a cold glass of milk or a hot mug of coffee, the creamy bitterness balances the sweetness. For a dessert spread, cut them into small squares and arrange on a platter; a drizzle of melted Biscoff or dark chocolate on top makes them party‑ready. You can also sandwich a scoop of vanilla ice cream between two bars for an indulgent treat.
How to Store Leftover Brown Butter Biscoff Rice Krispie Treats
Store the treats in an airtight container at room temperature for up to 5 days. Place parchment paper between layers to prevent sticking. Do not refrigerate, the cold will make the marshmallows firm and the bars will turn hard. If you need to keep them longer, see the freezing section below.
Can You Freeze Brown Butter Biscoff Rice Krispie Treats?
Yes, these freeze well. Wrap the uncut slab or individual squares tightly in plastic wrap, then again in aluminum foil. Freeze for up to 3 months. Thaw at room temperature (still wrapped) for about 1 hour before serving. The texture stays chewy and the Biscoff flavor remains intact.
How to Soften Brown Butter Biscoff Rice Krispie Treats
If you prefer a softer, gooey texture after storage, microwave a single bar for 10-15 seconds on a microwave‑safe plate. The warmth will melt the marshmallows slightly without making the bars soggy. For larger quantities, place them in a 300°F oven for 3-5 minutes, then let cool briefly before serving.
Brown Butter Biscoff Rice Krispie Treats FAQs
Can I use salted butter instead of unsalted?
Yes, but reduce or omit the added sea salt in the recipe to avoid making the treats too salty. The flaky sea salt on top is optional; you can skip it if using salted butter.
Why did my rice krispie treats turn out hard?
Hard treats usually come from pressing the mixture too firmly into the pan or overheating the marshmallows. Press gently and evenly, and remove the pot from the heat as soon as the marshmallows are fully melted.
Can I make these gluten-free?
Use certified gluten-free crispy rice cereal and replace the Biscoff cookies with a gluten-free speculoos cookie or leave them out. Note that traditional Biscoff cookies contain wheat, so they are not gluten-free.
What if I don’t have Biscoff cookie butter?
You can substitute smooth peanut butter, Nutella, or any other creamy nut or cookie butter. The flavor will change but the texture will remain similar.
How long do these treats stay fresh?
Store them in an airtight container at room temperature for up to 5 days. They stay chewy and delicious, though they may start to dry out slightly after day 4.
Recipe
Brown Butter Biscoff Rice Krispie Treats

Classic Rice Krispie Treats just got an upgrade with brown butter, Biscoff cookie butter, Biscoff cookies, and a little flaky sea salt. These might be the best rice krispie treats recipe ever!
Ingredients
- 0.5 cup unsalted butter, cut into tablespoon pieces
- 16 oz mini marshmallows
- 2 cup mini marshmallows, divided
- 0.5 cup Biscoff cookie butter
- 0.5 tsp pure vanilla extract
- 0.5 tsp sea salt
- 8 cup crispy rice cereal
- 2 cup Biscoff cookies, chopped
- flaky sea salt, for sprinkling on top, optional
Instructions
- 1
For super thick Rice Krispie Treats, grease an 9×9-inch baking pan with nonstick cooking spray. For regular Rice Krispie Treats, grease a 9×13-inch baking pan with nonstick cooking spray. You can also line the pan with parchment paper to make it easier for them to come out of the pan. Set pan aside.
- 2
Place the butter in a large pot and melt over medium heat, stirring often, until it foams, smells nutty, and browns. This will take about 5 minutes.
- 3
Add the 16 oz bag of marshmallows and stir until the marshmallows are completely melted.
- 4
Remove the pan from the heat and stir in the Biscoff cookie butter, vanilla extract and sea salt. Add the Rice Krispies and chopped Biscoff cookies; gently stir until well coated with the marshmallows. Stir in the remaining 2 cups of mini marshmallows.
- 5
Transfer mixture to the prepared pan. Lightly press the mixture into the pan, using a greased spatula. You can also lightly grease your hands and press the mixture into the pan. Don’t press too firmly or the treats will end up hard and dry. Sprinkle a little flaky sea salt on top, If desired.
- 6
Let the Rice Krispie Treats sit for about 1 hour. Cut into squares and serve.
Nutrition (per serving)
Calorie breakdown
How this was calculated — 8 of 9 ingredients matched
Nutrition information is automatically calculated from USDA FoodData Central, so should only be used as an approximation. Actual values may vary depending on the ingredients, brands, and preparation methods used.
Open in analyzerKeyword: dessert, No-Cook, sweet, vegetarian
This post may contain affiliate links. Read our disclosure policy.
Share this recipe
You Might Also Like
View All →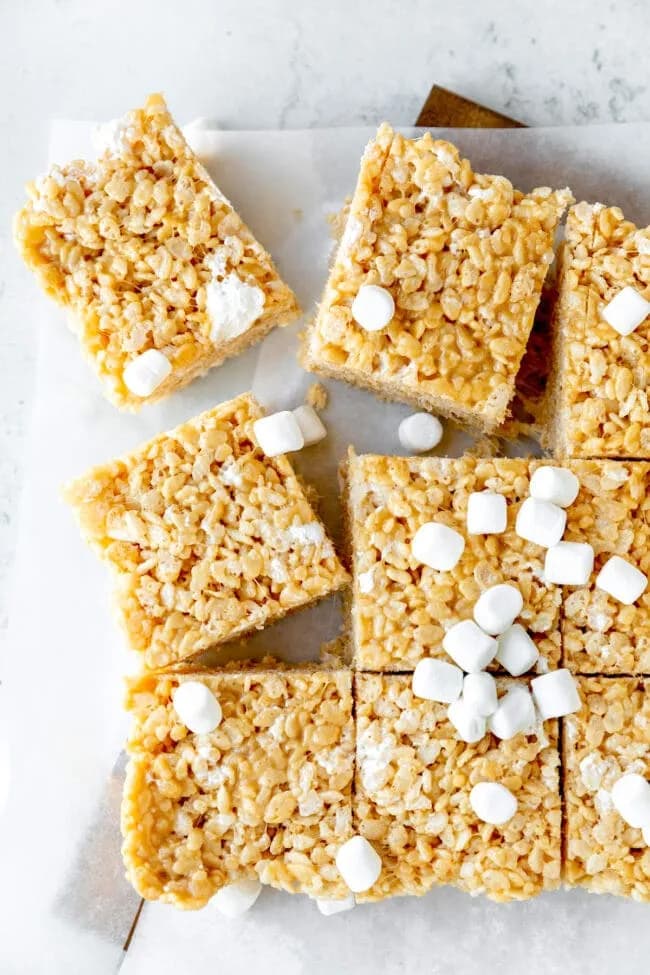


About the Author
NutriforksNutriForks is a home-cooking site built around two simple ideas: recipes should actually work, and you should know what’s in them. Every recipe pairs clear, tested instructions with a full nutrition breakdown, so healthy, everyday cooking is genuinely easy.