Double-Crusted Plum Crisp

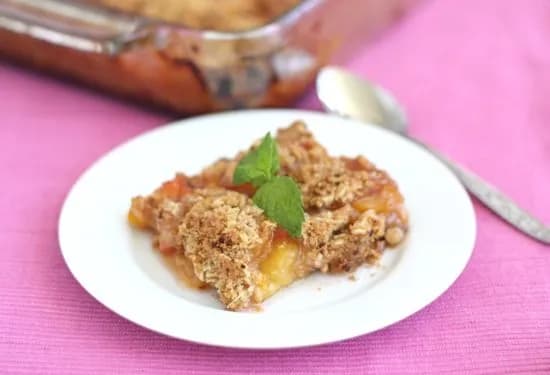
This double-crusted plum crisp has two layers of oat topping for extra crunch. Juicy plums and a tender bottom crust make an easy summer dessert. Try it tonight!
You may also enjoy Blackberry Coconut Crisp, Peanut Butter Apple Bars, Apple Cobbler, and Graham Cracker Toffee.
Why This Double-Crusted Plum Crisp Has Two Layers of Oat Topping
This double-crusted plum crisp gives you two layers of oat topping instead of one. The bottom layer bakes into a tender, almost cookie-like base that soaks up some of the plum juices, while the top stays crunchy and golden. I love how the contrast works with the soft, jammy fruit in between. It’s a simple switch that makes a familiar dessert feel new.
3 Reasons to Make This Plum Crisp Recipe
- Two crunchy layers. Pressing half the oat mixture into the pan creates a sturdy bottom crust, so every bite has texture from start to finish.
- Juicy plums shine. A light coating of sugar, cornstarch, and lemon juice lets the natural tart-sweet flavor of the fruit come through without being masked.
- Easy summer dessert. No pie dough to roll, no fancy equipment. Just mix, layer, and bake for a dessert that feels special with minimal effort.
Key Ingredients for a Double Crust Crisp
- Plums, Use ripe but firm plums so they hold their shape during baking. Red or black plums work well; if they’re very tart, add an extra tablespoon of sugar. No need to peel them, the skin softens and adds color.
- Rolled oats, Old-fashioned rolled oats give the best texture. Quick oats will work but turn softer. Steel-cut oats are too chewy and won’t crisp properly.
- Unsalted butter, Melted butter binds the topping. Using unsalted lets you control the salt level. If you only have salted, reduce the added salt to 1/4 teaspoon.
Kitchen Tools for an Oat Crisp
- 8×8-inch baking dish, Glass or ceramic works best. A metal pan may brown the bottom faster, so check a few minutes early.
- Cooking spray or butter, For greasing the dish so the bottom crust doesn’t stick.
- Medium and large mixing bowls, One for the crisp topping, one for the plum filling.
- Measuring cups and spoons, Accurate measurements matter for the cornstarch and cinnamon.
Tips for Making the Best Double-Crusted Plum Crisp
Press the bottom layer firmly and evenly into the dish. Use the back of a spoon or your fingers to create a compact, even surface. This keeps the base from crumbling when you slice it. For the topping, sprinkle it over the plums and pat it down gently, don’t press too hard or it will sink into the fruit.
Bake until the fruit is bubbling around the edges and the topping is deep golden brown. If your oven runs hot, check at 40 minutes. Let the crisp cool for a full 20 minutes before serving. The filling needs that time to set up, or it will run all over the plate.
Why Cornstarch and Lemon Juice Matter in a Plum Dessert
Cornstarch thickens the plum juices as they cook, giving you a glossy, jammy filling instead of a watery one. Without it, the crisp would be soupy. Lemon juice does double duty: it keeps the plums from turning brown and brightens their flavor. If your plums are very sweet, the lemon also balances the sugar.
Melted butter in the topping creates a cohesive crumb that bakes up crunchy. If you use cold butter cut into the dry ingredients, the topping will be more like a streusel with pea-sized clumps. Both work, but melted butter is faster and gives a more uniform texture.
Easy Plum Crisp Variations to Try
Swap the plums for an equal amount of sliced peaches, nectarines, or apricots. Stone fruits all work well with the same sugar and cornstarch mixture. Add a pinch of ground ginger or nutmeg to the topping for a warm spice note. For a gluten-free version, use certified gluten-free rolled oats and replace the all-purpose flour with a 1:1 gluten-free baking blend. If you prefer less sugar, reduce the granulated sugar in the filling to 1/3 cup, the plums’ natural sweetness will still shine.
What to Serve with Plum Crisp
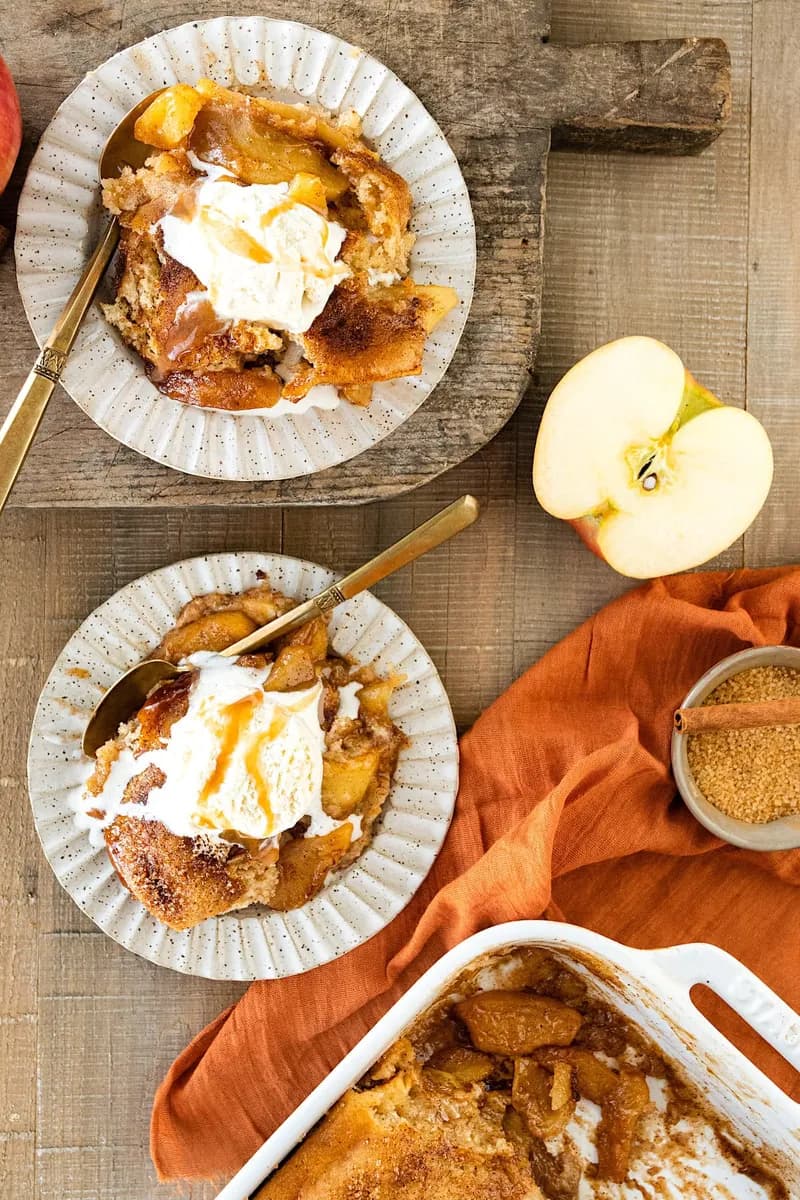
A scoop of vanilla ice cream is the classic choice, the cold creaminess contrasts with the warm fruit and crunchy oats. For a lighter option, try a dollop of whipped cream or a spoonful of Greek yogurt. A drizzle of warm caramel sauce over the top adds extra richness if you’re feeling indulgent. Pair the crisp with a glass of iced tea or a cold glass of milk to round out the summer dessert.
How to Store Leftover Plum Crisp
Cover the baking dish tightly with foil or plastic wrap and refrigerate for up to 4 days. The topping will lose some crunch over time, but the flavor deepens as the fruit sits. To keep it from getting soggy, you can store the crisp uncovered in the fridge for the first hour to let steam escape, then cover it.
Can You Freeze a Double-Crusted Plum Crisp?
Yes, freeze the baked and cooled crisp for up to 3 months. Wrap the entire dish in a layer of plastic wrap, then a layer of foil. To thaw, move it to the refrigerator overnight. Reheat in a 350°F oven until warmed through and the topping re-crisps, about 15 to 20 minutes. Freezing unbaked crisp is not recommended because the bottom crust may become soggy during thawing.
Best Way to Reheat Plum Crisp
Reheat individual portions in a 350°F oven for 10 to 12 minutes. This restores some crunch to the oat topping. The microwave will soften the crisp quickly, but the topping will turn chewy rather than crunchy. If you’re in a hurry, microwave for 30 seconds and then finish under the broiler for a minute or two, watch closely so it doesn’t burn.
Plum Crisp FAQs
Can I use frozen plums in this plum crisp recipe?
Yes, but thaw them first and drain off any excess liquid. Frozen plums release more juice, so you may need to add an extra teaspoon of cornstarch to keep the filling from being too runny. Bake time may also increase by 5 to 10 minutes.
Do I need to peel the plums before baking?
No, the skins soften during baking and are perfectly edible. They also add color and a slight tartness. If you prefer a smoother texture, you can peel them, but it’s not necessary.
Why does this recipe have a bottom crust?
The bottom layer of oat mixture creates a sturdy base that holds the juicy plums. It soaks up some of the fruit juices and becomes tender, while the top layer stays crunchy. This double crust gives you more texture in every bite than a traditional single-topping crisp.
How do I know when the crisp is done baking?
The topping should be deep golden brown and the fruit should be bubbling around the edges of the dish. If you see thick bubbles breaking through the topping in the center, it’s done. Let it cool for 20 minutes so the filling sets before serving.
Can I make this crisp ahead of time?
You can assemble the crisp up to a day ahead and refrigerate it unbaked. Add 5 to 10 minutes to the baking time since you’re starting from cold. Baked crisp can be stored in the fridge and reheated as described above.
Recipe
Double-Crusted Plum Crisp

A double-crusted crisp with a bottom and top oat layer sandwiching juicy plums, perfect for summer.
Ingredients
crisp
- 1.333 cup all-purpose flour
- 1 cup rolled oats
- 0.75 cup packed brown sugar
- 1 tsp cinnamon
- 0.5 tsp salt
- 10 tbsp unsalted butter, melted
plum filling
- 4 cup plums, thinly sliced, pit removed
- 0.5 cup granulated sugar
- 1 tbsp cornstarch
- 1 lemon lemon juice, juiced
- 1 tsp vanilla extract
Instructions
- 1
Preheat the oven to 350 degrees. Spray an 8 by 8 baking dish with cooking spray. Set aside.
- 2
To make the crisp, mix the flour, oats, brown sugar, cinnamon, and salt together in a medium bowl. Stir in the melted butter and mix until mixture is moist. Press half of the crisp topping into the prepared baking dish.
- 3
For the plum filling, put the plums, sugar, cornstarch, lemon juice, and vanilla in a large bowl. Stir until plums are well coated.
- 4
Spread the plums evenly over the bottom layer of the crisp. Sprinkle the remaining crisp over the plums. Gently pat the crisp topping down.
- 5
Bake in the middle of the oven for 45 minutes, or until the crisp is golden and the fruit is bubbling. Let cool for 20 minutes before serving.
Nutrition (per serving)
Calorie breakdown
How this was calculated — 10 of 11 ingredients matched
Nutrition information is automatically calculated from USDA FoodData Central, so should only be used as an approximation. Actual values may vary depending on the ingredients, brands, and preparation methods used.
Open in analyzerKeyword: dessert, nutFree, Oven Baked, summer, vegetarian
This post may contain affiliate links. Read our disclosure policy.
Share this recipe
You Might Also Like
View All →



About the Author
NutriforksNutriForks is a home-cooking site built around two simple ideas: recipes should actually work, and you should know what’s in them. Every recipe pairs clear, tested instructions with a full nutrition breakdown, so healthy, everyday cooking is genuinely easy.