Teriyaki Chicken

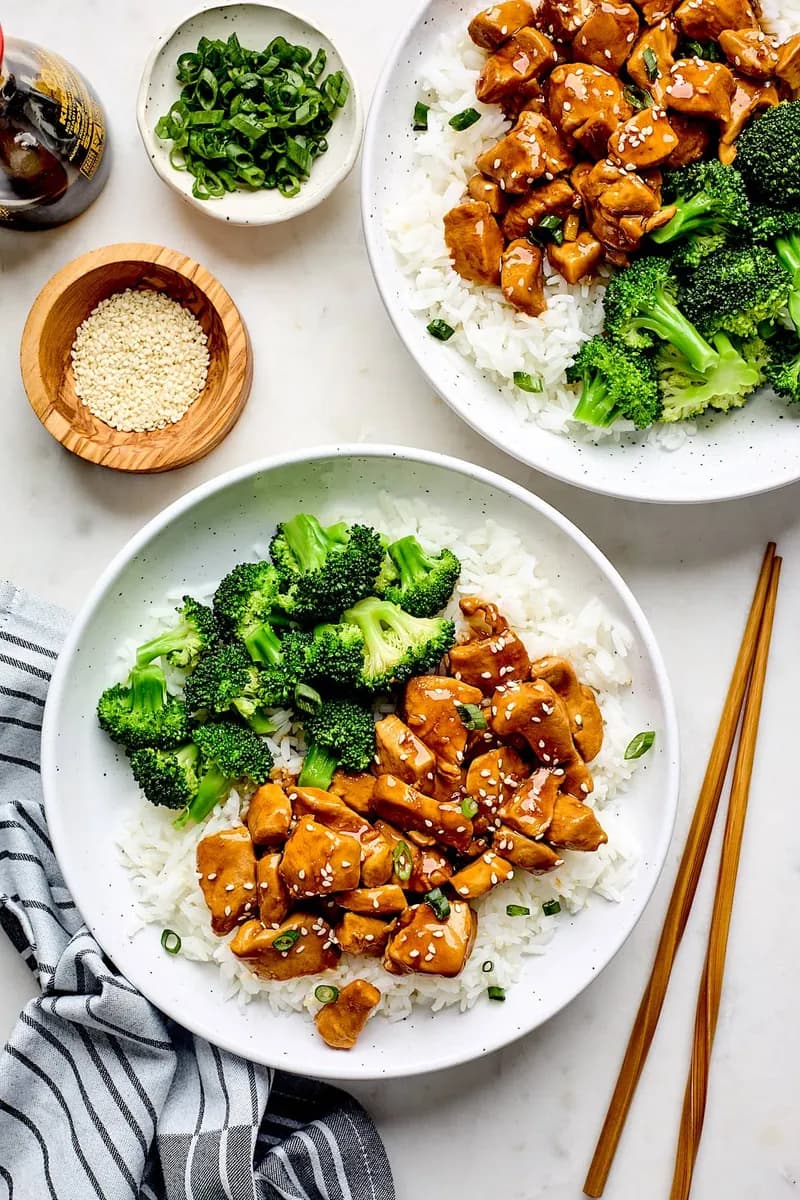
This teriyaki chicken recipe is ready in 15 minutes! Homemade sauce coats each piece in a savory-sweet glaze. Serve with rice and broccoli for a quick weeknight dinner th
Another reason to love Dinner: Lemon Butter Chicken, Sloppy Joes, Sausage and Peppers with Zucchini Noodles, and Spring Vegetable Stir Fry with Lemon Ginger Sauce.
A 15-Minute Dinner That Beats Takeout
This teriyaki chicken has saved countless weeknights in my kitchen. The homemade teriyaki sauce comes together in minutes and thickens right in the pan, coating each piece of chicken in a glossy, savory-sweet glaze. It’s faster than ordering takeout, and my kids actually ask for the broccoli on the side.
Why This Easy Teriyaki Chicken Works So Well
- Ready in 15 minutes, from prep to plate, this recipe delivers a full dinner faster than delivery.
- No marinating needed, the sauce simmers and thickens as the chicken cooks, so that deep teriyaki flavor builds right in the pan.
- Better than takeout, you control the salt and sweetness, and it costs a fraction of what you’d pay for delivery.
Key Ingredients for the Best Homemade Teriyaki Sauce
- Soy sauce, use low-sodium so you can adjust saltiness. For a gluten-free version, swap in tamari.
- Fresh ginger, keep a knob in the freezer and grate with a microplane straight into the bowl; it releases more juice and flavor than dried.
- Cornstarch, it thickens the sauce into a glossy coating. Whisk it into the cold liquid first so it doesn’t clump when heated.
Kitchen Tools for Quick Teriyaki Chicken
- Large skillet or wok, gives the chicken room to sear without steaming.
- Microplane, makes grating frozen ginger effortless and releases maximum flavor.
- Spatula, a thin metal or flexible silicone spatula helps flip the chicken and scrape up any browned bits.
Tips for Perfect Teriyaki Chicken Every Time
Cut the chicken into even 1-inch cubes so they cook at the same rate. Don’t overcrowd the pan; if needed, sear in two batches. The chicken only needs a quick sear on each side, it will finish cooking while the sauce simmers. Let the sauce bubble for 4 to 5 minutes; it should coat the back of a spoon before you add the chicken back.
Pro-Level Advice for the Sauce
Whisk the cornstarch into the cold soy sauce mixture until completely dissolved before pouring it into the pan. This prevents lumps. Taste the sauce before simmering and adjust the sweetness by adding more brown sugar or cut the salt with a splash of water. If the sauce thickens too much, add a tablespoon of water at a time until it reaches the right consistency.
Easy Teriyaki Chicken Variations to Try
Swap chicken thighs for breasts, they stay juicier and can take a little more heat. Add heat with red pepper flakes or sriracha in the sauce. Stir in steamed broccoli or snap peas during the last minute of cooking for a one-pan meal. For a gluten-free version, use tamari and ensure your rice vinegar is labeled gluten-free.
What to Serve with Teriyaki Chicken
Serve this chicken over steamed white, jasmine, or brown rice to soak up the extra sauce. Steamed broccoli is the classic side, but roasted green beans or a quick cabbage salad with sesame dressing also work. For a low-carb option, serve over cauliflower rice or zucchini noodles.
How to Store Leftover Teriyaki Chicken
Let the chicken cool, then transfer to an airtight container. It keeps in the fridge for up to 4 days. Store rice and broccoli separately so they don’t get soggy from the sauce.
Can You Freeze Teriyaki Chicken?
Yes. Cool the chicken completely, then place it in a freezer-safe container. Freeze for up to 3 months. Thaw overnight in the refrigerator before reheating.
Best Way to Reheat Teriyaki Chicken
For the best texture, reheat in a skillet over medium heat with a splash of water or extra soy sauce. Stir until warmed through and the sauce becomes glossy again. You can also microwave it, but the chicken may dry out a bit, add a damp paper towel over the bowl to help retain moisture.
Frequently Asked Questions About This Teriyaki Chicken
Can I use chicken thighs instead of breasts?
Yes. Boneless skinless thighs work great and stay juicier. Cut them into 1-inch cubes and cook exactly as directed; they may need 1 extra minute per side during searing.
Can I make the sauce ahead of time?
Absolutely. Whisk all sauce ingredients together and store in the fridge for up to a week. Give it a stir before using, as the cornstarch settles.
How do I avoid lumps in the sauce?
Make sure the cornstarch is fully dissolved in the cold liquid before adding it to the hot pan. Whisk until no white streaks remain.
Is this recipe gluten-free?
Use tamari or a certified gluten-free soy sauce in place of regular soy sauce. Double-check that your rice vinegar and other ingredients are gluten-free as well.
Recipe
Teriyaki Chicken

You only need 15 minutes to get this delicious dinner on the table. Serve with rice, steamed broccoli, and you have a complete meal that tastes better than takeout!
Ingredients
- 1 tbsp olive oil
- 1.5 lb boneless skinless chicken breasts, cut into 1-inch cubes
- 0.33 cup low sodium soy sauce
- 0.25 cup brown sugar
- 0.25 cup rice wine vinegar
- 0.5 tsp toasted sesame oil
- 2 tsp fresh ginger, peeled and grated
- 3 clove garlic cloves, minced
- 2 tsp cornstarch
garnish
- sesame seeds and sliced green onions, for garnish
serving
- rice and steamed broccoli, for serving
Instructions
- 1
In a large skillet or wok, heat the oil over medium-high heat. Add the chicken and cook for 2 minutes. Use a spatula to flip it over; cook the other side for an additional 1-2 minutes. It doesn’t have to be cooked through, just seared on the outside.
- 2
In a small mixing bowl, whisk together soy sauce, brown sugar, vinegar, sesame oil, fresh ginger, garlic, and cornstarch.
- 3
Pour the sauce in the pan and stir. Let simmer for 4 to 5 minutes or until the sauce has thickened and the chicken is cooked through.
- 4
Garnish with sesame seeds and green onions. Serve over rice and with steamed broccoli, if desired.
Nutrition (per serving)
Calorie breakdown
How this was calculated — 11 of 11 ingredients matched
Nutrition information is automatically calculated from USDA FoodData Central, so should only be used as an approximation. Actual values may vary depending on the ingredients, brands, and preparation methods used.
Open in analyzerKeyword: Asian, Chicken, easy, quick, Skillet, stir-fry
This post may contain affiliate links. Read our disclosure policy.
Share this recipe
You Might Also Like
View All →



About the Author
NutriforksNutriForks is a home-cooking site built around two simple ideas: recipes should actually work, and you should know what’s in them. Every recipe pairs clear, tested instructions with a full nutrition breakdown, so healthy, everyday cooking is genuinely easy.