Oreo Cheesecake Cookie Dough Bars

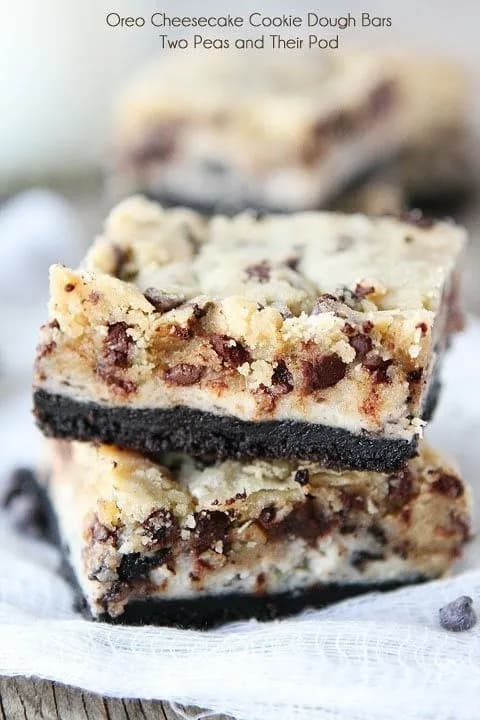
These Oreo Cheesecake Cookie Dough Bars combine Oreos, cheesecake, and cookie dough in one easy dessert. No water bath needed! Get the recipe now.
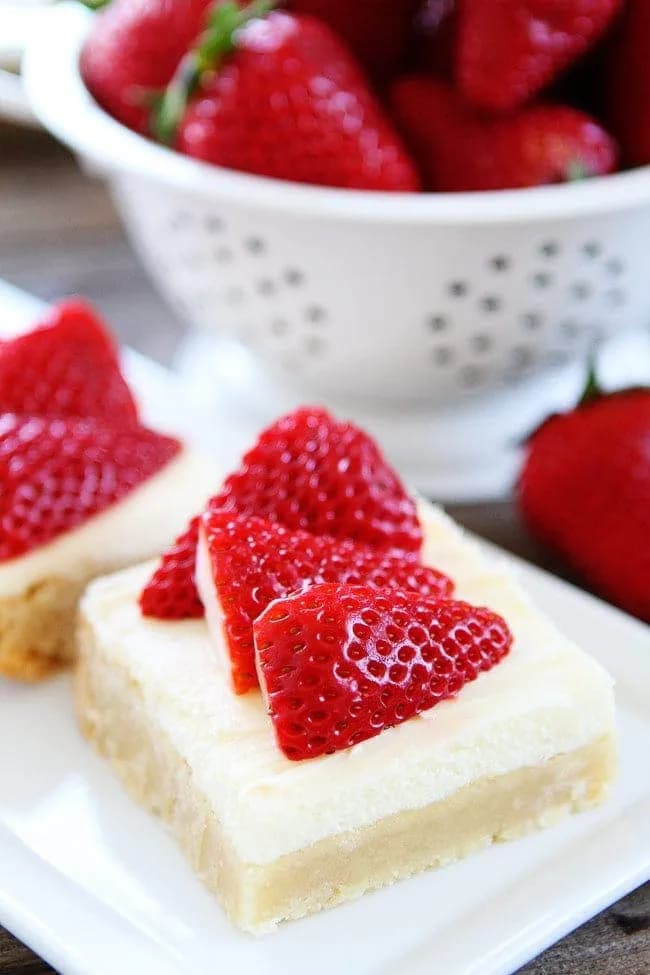
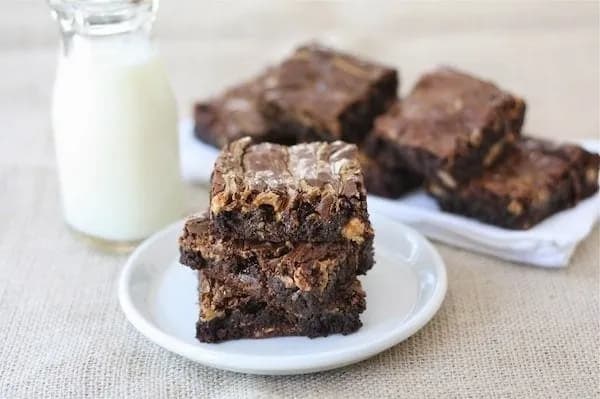
A few more worth bookmarking: Flourless Chocolate Cookies, Fudgy Brownie, Chocolate Chip Cookie Bark, and Strawberries and Cream Bars.
Why These Oreo Cookie Dough Cheesecake Bars Are My Go-To Dessert
I’ve always been a sucker for anything that combines cookie dough and cheesecake. Throw in Oreos and I’m done. These bars start with an Oreo crust, then a creamy cheesecake layer, and finally clumps of chocolate chip cookie dough on top. It’s like three desserts in one, but they all work together. My family goes crazy for these bars, they disappear faster than I can cut them. And the best part? No water bath needed. The crust and dough protect the cheesecake as it bakes, so you get a perfect texture every time.
3 Reasons You’ll Love These Cheesecake Cookie Dough Bars
- Three textures in every bite: Crunchy Oreo crust, smooth cheesecake, and chewy cookie dough. It’s a party in your mouth.
- No water bath required: The crust and top dough seal in the cheesecake, preventing cracks without the fuss.
- Easy to customize: Swap in your favorite Oreo flavor or use different chips, they’re super forgiving.
Key Ingredients for Oreo Cheesecake Cookie Dough Bars
- Oreos: Use regular Oreos for the crust and crushed pieces in the cheesecake. Avoid double-stuffed, they’re too creamy and make the crust greasy. For the crust, crush them into fine crumbs (a food processor works great).
- Cream cheese: Full-fat block cream cheese gives the richest, smoothest cheesecake. Let it come to room temperature before mixing to avoid lumps. If you’re in a hurry, microwave it in 10-second bursts until softened.
- Butter: Unsalted butter lets you control the salt. Use melted butter for the crust and softened butter for the cookie dough. For the crust, make sure the butter is fully incorporated into the crumbs.
Kitchen Tools for Making Cheesecake Cookie Dough Bars
- 8-inch square baking pan, metal or glass works; line with parchment paper for easy removal.
- Stand mixer or hand mixer, for creaming the cream cheese and making the cookie dough.
- Food processor (optional but handy), for crushing Oreos into fine crumbs.
- Parchment paper, to line the pan with overhang so you can lift the bars out cleanly.
- Cooling rack, lets air circulate under the pan for even cooling.
Tips for the Best Oreo Cheesecake Bars
When making the crust, press the Oreo-butter mixture firmly into the pan, I use the bottom of a measuring cup to get it even. Bake it just until set (6-7 minutes), but don’t overbake or it’ll be too hard. For the cookie dough, mix the flour in just until combined; overmixing makes the dough tough. When you drop the dough on top of the cheesecake, flatten each clump slightly so it bakes evenly, it’s okay if there are gaps. The bars are done when the top feels dry and firm, and the pan jiggles just a little in the center. Let them cool completely in the pan before slicing, patience is key for clean cuts.
Expert Tips for a Perfect Cheesecake Layer
For the smoothest cheesecake, make sure your cream cheese is at room temperature, cold cream cheese leads to lumps. Beat it with the sugar until completely smooth before adding the egg. When you add the egg, mix on low just until incorporated; overbeating incorporates too much air and can cause cracks. The crushed Oreos stir in easily, don’t crush them too fine, you want some small chunks for texture. If you find the cheesecake layer is too soft after baking, it might be slightly underdone. Give it a few more minutes, but check every 2 minutes, you want the center to be almost set with a slight jiggle.
How to Slice Oreo Cheesecake Bars Neatly
For clean cuts, refrigerate the bars for at least 4 hours or overnight. Use a long, sharp knife and wipe it clean between each cut with a damp paper towel. For the first cut, run the knife under hot water, dry it, then slice. The heat helps glide through the cookie dough. Cut into 9 or 16 squares, smaller pieces are easier to handle. If the dough top crumbles a bit, no one will complain.
Fun Variations on Cookie Dough Cheesecake Bars
Switch up the Oreos: use mint, peanut butter, or birthday cake flavors for a different twist. For the cookie dough, try using white chocolate chips or butterscotch chips instead of semi-sweet. If you’re a peanut butter lover, swirl 2 tablespoons of peanut butter into the cheesecake batter before adding the Oreos. Want a gluten-free version? Use gluten-free Oreos and a 1:1 gluten-free flour blend in the cookie dough. The crust and dough will work the same, just check the doneness a few minutes earlier.
How to Serve Oreo Cheesecake Cookie Dough Bars
These bars are fantastic straight from the fridge, cold and firm, with the cheesecake layer extra creamy. If you prefer a softer texture, let them sit at room temperature for 10-15 minutes. For a real treat, serve alongside a scoop of vanilla ice cream or a dollop of whipped cream. A drizzle of chocolate sauce takes them over the top. They also hold up well on a dessert table and can be cut into small squares for parties.
How to Store Oreo Cheesecake Cookie Dough Bars
Store the cooled bars in an airtight container in the refrigerator. They’ll stay fresh for up to 5 days. The texture is best when cold, but you can let them sit at room temperature for a few minutes before eating if you prefer. Keep them covered so the cookie dough doesn’t dry out. If you stack them, place a layer of parchment paper between each layer.
Can You Freeze Oreo Cheesecake Bars?
Yes, these bars freeze beautifully. After cooling completely, wrap the whole slab (or individual squares) tightly in plastic wrap, then aluminum foil. Freeze for up to 3 months. To thaw, transfer to the refrigerator overnight. Don’t thaw at room temperature, the cheesecake can get weepy. Once thawed, enjoy within a few days. You can also eat them straight from the freezer for a fudgy, ice-cream-like treat.
Oreo Cheesecake Cookie Dough Bars FAQs
Can I use reduced-fat cream cheese?
You can, but the cheesecake layer won’t be as rich and might be slightly softer. For best results, use full-fat block cream cheese. Avoid whipped cream cheese, it has too much air and will affect the texture.
Can I skip the Oreo crust?
You could, but the crust adds a great crunch and prevents the cheesecake from sticking. Without it, the bars will be harder to remove from the pan. If you skip it, grease the pan well and consider using a removable-bottom pan.
How do I prevent cracks in the cheesecake?
Don’t overmix the batter, and bake just until set, a slight jiggle in the center is fine. The cookie dough top also helps shield the cheesecake from direct heat. Let the bars cool gradually in the pan on a wire rack, then refrigerate before cutting.
Can I use store-bought cookie dough?
Yes, but you’ll lose some of the homemade flavor and texture. If using store-bought, use about 10-12 ounces and flatten it into small pieces. Bake as directed, but check for doneness a few minutes early since store dough may spread differently.
Do I need to refrigerate these bars?
Yes, because of the cheesecake layer. They must be stored in the refrigerator. They’re safe at room temperature for up to 2 hours, but beyond that, refrigerate to keep the cream cheese safe.
Recipe
Oreo Cheesecake Cookie Dough Bars

Oreo Cheesecake Cookie Dough Bars-Oreos, cheesecake, and cookie dough? Talk about a dream dessert!
Ingredients
crust
- 1.5 cup oreo cookies, crushed
- 5 tbsp unsalted butter, melted
cookie dough
- 5 tbsp unsalted butter, at room temperature
- 0.333 cup brown sugar, packed
- 3 tbsp granulated sugar
- 0.25 tsp salt
- 1 tsp vanilla extract
- 0.75 cup all-purpose flour
- 0.75 cup mini chocolate chips
cheesecake filling
- 10 oz cream cheese, at room temperature
- 0.25 cup granulated sugar
- 1 large large egg, at room temperature
- 1 tsp vanilla extract
- 0.25 cup oreos, crushed
Instructions
- 1
Preheat the oven to 325 F. Line an 8-inch square baking pan with parchment paper allowing a little overhang. Spray with cooking spray and set aside.
- 2
In a medium bowl, mix the Oreo crumbs and melted butter together until thoroughly combined. Press the mixture into the bottom of the prepared pan. Bake in preheated oven for 6-7 minutes. Remove pan to a cooling rack. Leave the oven on.
- 3
While the crust is cooling, prepare the cookie dough. In the bowl of a stand mixer, beat the butter, brown sugar, granulated sugar, salt and vanilla until smooth and combined, about 1 minute. Slowly mix in the flour and mix until just incorporated. Mix in the mini chocolate chips. Set aside.
- 4
In the bowl of a stand mixer, cream the cream cheese and sugar together until smooth. Mix in the egg and vanilla just until incorporated. Mix in the crushed Oreos. Pour the Oreo cheesecake batter into the prepared crust.
- 5
Use your hands to form clumps of cookie dough. Flatten the clumps of dough in the palm of your hands to flatten them out. Distribute the cookie dough evenly on top of the cheesecake batter. You will cover most of the cheesecake batter. It doesn’t matter if it isn’t perfect.
- 6
Bake for about 30-35 minutes, until the cookie dough top feels dry and firm and the pan is set. You can give it a little shake to see if it is set. Move bars to a cooling rack and allow to cool completely.
- 7
Lift the cooled bars out by the overhang; cut into squares and store in the refrigerator. Serve cold or at room temperature.
Nutrition (per serving)
Calorie breakdown
How this was calculated — 13 of 14 ingredients matched
Nutrition information is automatically calculated from USDA FoodData Central, so should only be used as an approximation. Actual values may vary depending on the ingredients, brands, and preparation methods used.
Open in analyzerKeyword: cheesecake, Chocolate, cookie dough, dessert, nutFree, Oven Baked, vegetarian
This post may contain affiliate links. Read our disclosure policy.
Share this recipe
You Might Also Like
View All →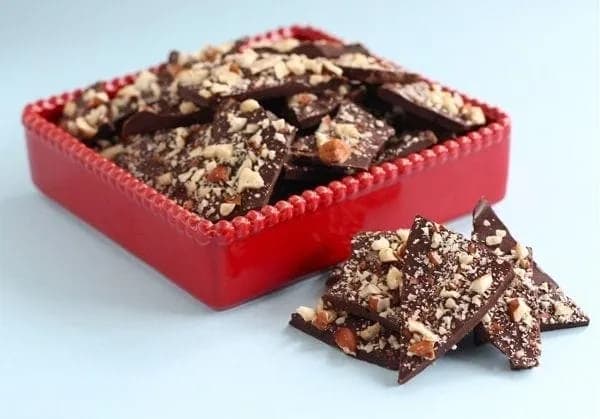



About the Author
NutriforksNutriForks is a home-cooking site built around two simple ideas: recipes should actually work, and you should know what’s in them. Every recipe pairs clear, tested instructions with a full nutrition breakdown, so healthy, everyday cooking is genuinely easy.