Deviled Eggs


These classic Deviled Eggs are a potluck and party favorite with just six ingredients. Learn how to make the best creamy filling for Easter or any gathering! Get the reci
Since dairyFree is on the menu, Roasted Mustard Cauliflower, Balsamic Vinaigrette, Sushi Salad, and Honey Mustard Sheet Pan Chicken with Brussels Sprouts fit right alongside it.
Why Classic Deviled Eggs Are a Party Staple
Deviled eggs are a timeless appetizer, and this recipe is as straightforward as it is satisfying. With just six ingredients and a quick 10-minute boil, you get a creamy, tangy filling that pairs perfectly with tender egg whites. It’s no wonder these are a must-have for Easter, potlucks, and any gathering where good finger food is welcome.
What Makes This Deviled Eggs Recipe So Good
- Only six ingredients, most are pantry staples, so you can whip up a batch anytime.
- Quick to make, from start to finish, you’re looking at about half an hour, and most of that is hands-off boiling and cooling.
- Perfect for parties, these little bites travel well and disappear fast.
Key Ingredients for Classic Deviled Eggs
- Eggs, Use large eggs that are about a week old; they peel much easier than farm-fresh ones. Older eggs have slightly thinner whites, which shrink away from the shell during boiling.
- Mayonnaise, Full-fat mayo gives the creamiest, richest filling. Avoid salad dressing or Miracle Whip, as they’re sweeter and thinner.
- Dijon mustard, It adds a sharp tang that balances the richness of the yolks and mayo. Stone-ground Dijon works, too, but it will be a little less smooth.
Kitchen Tools for Deviled Eggs
- Large saucepan, Deep enough to hold the eggs in a single layer and cover them with 3 inches of water.
- Slotted spoon or ladle, For gently lowering eggs into the hot water without cracking them.
- Bowl for ice water, A big bowl filled with ice and cold water to stop the cooking immediately.
- Piping bag (optional), If you want a neat, decorative swirl of filling instead of spooning it in.
Tips for Making the Best Deviled Eggs
For perfectly hard-boiled eggs, start with eggs that are at least a week old, they peel more easily than super fresh ones. After boiling, plunge them into an ice bath for a full 15 minutes; this stops the cooking and makes peeling a breeze. When you mash the yolks, use the back of a fork until the mixture is completely smooth, no lumps. If the filling seems too thick, add a tiny splash more vinegar or a little extra mayo. You can spoon the filling into the whites or pipe it for a more polished look; either way, don’t overfill or the eggs won’t sit flat on the plate.
How to Get Perfect Hard-Boiled Eggs for Deviled Eggs
The secret to easy-to-peel hard-boiled eggs is starting with slightly older eggs and shocking them in an ice bath. Bring a pot of water to a gentle boil, then lower the eggs in with a slotted spoon. Boil them for exactly 10 minutes, no longer, or the yolks will turn gray and crumbly. Immediately transfer them to an ice water bath and let them sit for 15 minutes. This step is crucial: it stops the cooking and causes the egg to contract slightly, pulling the shell away from the white for easier peeling. After that, peel under cool running water to rinse away any tiny shell fragments.
Deviled Eggs Variations to Try
Once you master the classic, there are plenty of ways to switch it up. For a smoky twist, add a pinch of smoked paprika to the yolk mixture and garnish with crispy crumbled bacon. If you’re in the mood for something fresh, mash half an avocado into the yolks and use lime juice instead of vinegar, this makes a creamy, green version. A little dash of hot sauce or cayenne pepper adds heat without overpowering the delicate egg flavor. For extra texture, top with finely chopped chives or a small spoonful of relish.
How to Serve Deviled Eggs for Any Occasion
Arrange the finished eggs on a platter and sprinkle with a dusting of paprika. For a pop of color and freshness, top with finely chopped chives or a tiny sprig of dill. These easy deviled eggs pair nicely with a crudité platter, potato salad, or grilled chicken. They’re also a natural fit for an Easter appetizer spread or a potluck appetizer table alongside dips and chips.
How to Store Leftover Deviled Eggs
Store any leftover deviled eggs in a single layer in an airtight container, or cover the platter tightly with plastic wrap. They’ll keep in the refrigerator for up to two days. If you’re making them ahead, you can prepare the filling and the whites separately; store the whites in one container and the filling in a piping bag or bowl. Assemble them no more than a few hours before serving for the best texture and appearance.
Deviled Eggs FAQs
Can I make deviled eggs ahead of time?
Yes. You can hard-boil and peel the eggs up to 2 days ahead. Store the peeled whites and yolk mixture separately in the fridge. Assemble the deviled eggs a few hours before serving to keep the whites from getting soggy.
What’s the best way to peel hard-boiled eggs?
After boiling, transfer the eggs to an ice bath and let them cool for 15 minutes. Gently crack the shell all over, then roll the egg between your hands to loosen it. Start peeling from the wider end, where the air pocket is, usually the shell comes off more easily there.
Can I substitute the mayonnaise for a lighter option?
You can use Greek yogurt or a light mayo, but the filling will be less rich and a little tangier. If you use yogurt, add a teaspoon of olive oil to help the texture stay creamy.
Can I freeze deviled eggs?
Freezing is not recommended because the texture of the egg whites becomes watery and rubbery after thawing. The filling can be frozen separately, but it may separate upon thawing and won’t be as smooth.
Recipe
Deviled Eggs
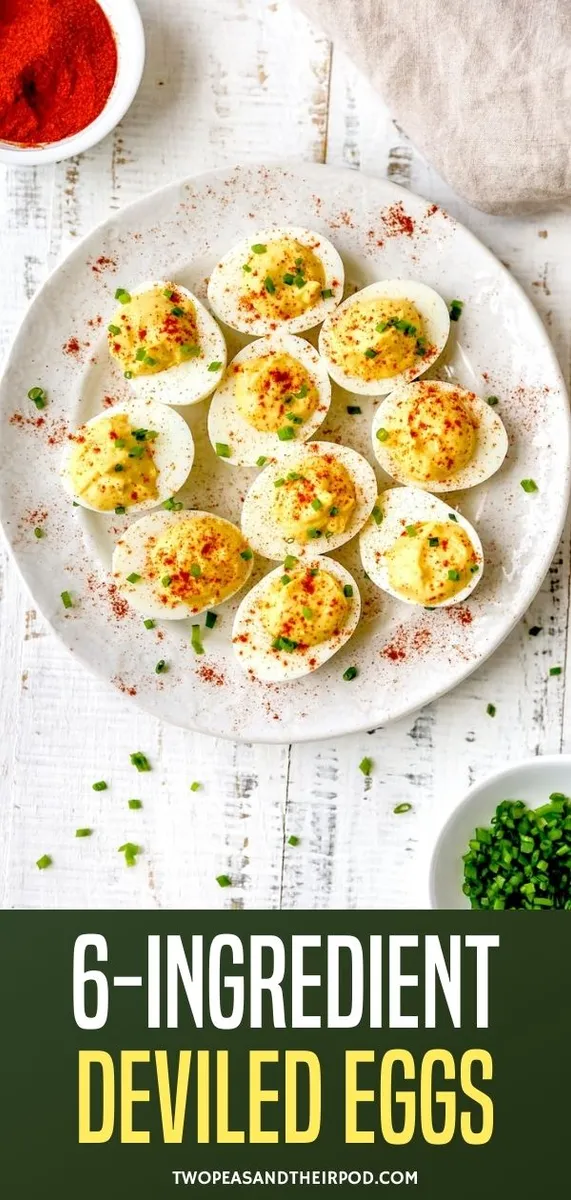
These classic Deviled Eggs are a potluck and party favorite, especially at Easter time! They make an impressive appetizer and only have six ingredients. Everyone loves this nostalgic recipe!
Ingredients
- 6 large eggs
- 3 tbsp mayonnaise
- 1 tsp Dijon mustard
- 1 tsp vinegar, apple cider or white wine
- to taste kosher salt and black pepper
- for garnish paprika, for garnish
Instructions
- 1
Fill a large saucepan with about 3 inches of water. Bring to a slow boil over medium-high heat. Using a ladle or large spoon, gently lower the eggs into the pan, making sure they are in a single layer and not crowded. Bring the water back to a slow boil and cook for 10 minutes.
- 2
Meanwhile, prepare a bowl of ice water. When the eggs are done cooking, carefully transfer them to the ice water and let them cool for 15 minutes.
- 3
Remove the eggs from the ice bath and carefully peel them. Slice in half lengthwise. Scoop the egg yolks into a bowl and arrange the egg whites on a plate or platter.
- 4
Add the mayonnaise, Dijon mustard, vinegar, salt, and pepper to the egg yolks and mash together with the back of a fork until smooth.
- 5
Use a spoon to fill the center hole of the egg whites. Alternatively, spoon the yolk mixture into a piping bag with a tip and pipe the filling into the egg whites.
- 6
Sprinkle the tops with paprika and serve.
Nutrition (per serving)
Calorie breakdown
How this was calculated — 6 of 6 ingredients matched
Nutrition information is automatically calculated from USDA FoodData Central, so should only be used as an approximation. Actual values may vary depending on the ingredients, brands, and preparation methods used.
Open in analyzerKeyword: Boiled, budget-friendly, dairyFree, gluten-free, glutenFree, nutFree, vegetarian
This post may contain affiliate links. Read our disclosure policy.
Share this recipe

About the Author
NutriforksNutriForks is a home-cooking site built around two simple ideas: recipes should actually work, and you should know what’s in them. Every recipe pairs clear, tested instructions with a full nutrition breakdown, so healthy, everyday cooking is genuinely easy.