Chocolate Chip Cookie Ice Cream Bars

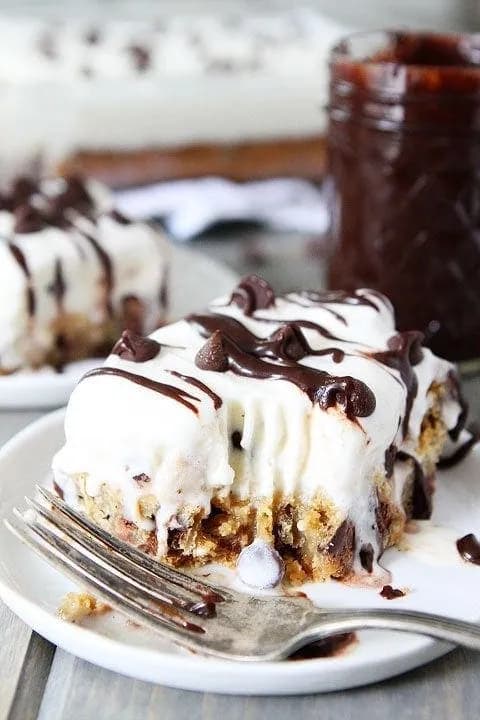
These chocolate chip cookie ice cream bars combine chewy cookie bars with creamy cookie dough ice cream. Drizzle with hot fudge for the ultimate summer treat! Get the rec
Pair this with Pumpkin Chocolate Chip Bundt Cake or Flourless Chocolate Cookies for a full spread.
The Best Summer Dessert: Cookie Dough Ice Cream Bars
These chocolate chip cookie ice cream bars are the kind of dessert that makes you wonder why you ever bothered with plain ice cream. A thick, chewy chocolate chip cookie bar forms the base, then gets topped with a generous layer of creamy cookie dough ice cream. A drizzle of hot fudge turns it into something truly special. The contrast between the soft, buttery cookie and the cold, smooth ice cream is what keeps me coming back.
Why You’ll Love These Cookie Ice Cream Bars
- Two desserts in one: a chewy chocolate chip cookie bar and a scoop of your favorite cookie dough ice cream, all in one slice.
- Easy to make ahead for parties or hot summer days, just assemble, freeze, and cut when ready.
- Customizable with different ice cream flavors or mix-ins, so you can make them your own.
Key Ingredients for These Cookie Ice Cream Bars
- Butter: Melted butter gives the cookie bars a chewy, dense texture. If you use salted butter, reduce the added salt to 1/4 teaspoon.
- Light brown sugar: Adds moisture and a mild caramel flavor. Dark brown sugar works too and will give a deeper molasses taste.
- Chocolate chip cookie dough ice cream: The star of the show. Any brand works, but let it soften on the counter for 30 minutes so it spreads easily over the cookie base.
Kitchen Tools for Making Cookie Ice Cream Bars
- 9×13-inch baking pan
- Stand mixer or hand mixer with a large bowl
- Rubber spatula
- Sharp knife
Tips for Making the Best Chocolate Chip Cookie Ice Cream Bars
Softening the ice cream is key. Let it sit on the counter for 30 minutes before spreading, you want it soft enough to smooth over the cookie bars but still slightly frozen. When it’s time to cut, run a sharp knife under hot water between each slice. The bars will be hard, so a hot knife makes clean cuts much easier. If you eat them straight from the freezer, they’ll be too firm for a fork. Let them sit for a few minutes, or just pick them up and enjoy the mess.
Expert Tips for Perfect Cookie Bars Every Time
Using melted butter instead of softened butter gives these cookie bars a denser, chewier texture. That’s because melted butter incorporates less air during mixing, which means less puffing in the oven. Light brown sugar adds moisture and a subtle caramel flavor that pairs beautifully with the chocolate chips. Don’t overbake the bars, pull them when the top is light golden brown and the edges just start to pull away from the pan. They’ll continue to set as they cool.
Fun Variations for Cookie Ice Cream Bars
Swap the cookie dough ice cream for vanilla, chocolate, or strawberry for a different flavor profile. Add chopped toasted nuts, toffee bits, or crushed cookies to the ice cream layer before freezing. Use dark chocolate chips or white chocolate chips in the cookie base for a twist. If you need a gluten-free version, substitute the all-purpose flour with a 1-to-1 gluten-free baking blend, the texture will still be chewy and delicious.
How to Serve Cookie Dough Ice Cream Bars
Drizzle each bar with warm hot fudge sauce right before serving, it’s the classic finishing touch. You can also add a sprinkle of flaky sea salt or a few extra chocolate chips on top. These bars are messy to eat, but that’s part of the fun. Serve them with a tall glass of cold milk to balance the sweetness. For a party, cut them into smaller squares so everyone can grab one without too much fuss.
How to Store Leftover Cookie Ice Cream Bars
Store any leftover bars in an airtight container in the freezer. They’ll keep for several days without losing their texture. If the bars are too hard to bite into straight from the freezer, let them sit at room temperature for 5 to 10 minutes before serving. That softens the ice cream just enough to make them easy to eat.
Make-Ahead Freezing Tips for These Ice Cream Bars
The assembled bars need to freeze for at least 2 hours before you cut them. For longer storage, wrap the pan tightly with plastic wrap and then foil after the ice cream has fully hardened. This prevents freezer burn and keeps the cookie base from drying out. You can make these bars up to a week in advance, just cut and serve straight from the freezer when you’re ready.
Chocolate Chip Cookie Ice Cream Bars FAQs
Can I use homemade cookie dough ice cream?
Yes, absolutely. Just make sure it’s softened enough to spread, let it sit out for about 30 minutes. Homemade ice cream tends to be softer than store-bought, so keep an eye on it.
How do I cut clean squares without the ice cream melting?
Run a sharp knife under hot water, then dry it quickly before each cut. The heat helps the knife glide through the frozen ice cream without cracking the cookie base. Work fast and wipe the blade clean between slices.
Can I use a different pan size?
You can, but the baking time will change. A smaller pan (like 8×8) will give thicker cookie bars and may need a few extra minutes in the oven. A larger pan will make thinner bars that bake faster. Keep an eye on the color and edges.
Is the hot fudge necessary?
Not strictly, but it really takes these bars over the top. The warm fudge contrasts with the cold ice cream and adds a rich chocolate layer. If you skip it, consider a drizzle of caramel sauce or a dusting of cocoa powder instead.
Recipe
Chocolate Chip Cookie Ice Cream Bars
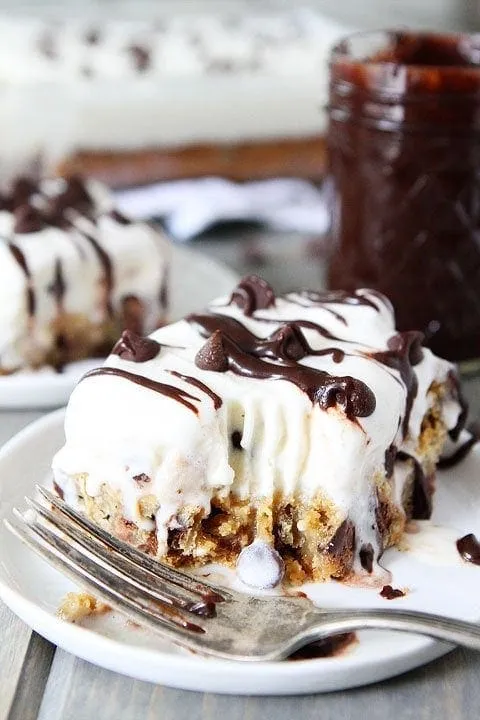
Chocolate chip cookie bars topped with chocolate chip cookie dough ice cream. A drizzle of hot fudge is highly recommended!
Ingredients
- 2.125 cup all-purpose flour
- 0.5 tsp salt
- 0.5 tsp baking soda
- 12 tbsp butter, melted and cooled to room temperature
- 1 cup light brown sugar
- 0.5 cup granulated sugar
- 1 large egg
- 1 large egg yolk
- 2 tsp vanilla extract
- sea salt, for sprinkling over bars, if desired
- hot fudge sauce, for serving, if desired
cookie bars
- 2 cup chocolate chips
ice cream layer
- 1.5 qt chocolate chip cookie dough ice cream, softened
- 0.333 cup chocolate chips
Instructions
- 1
First, make the chocolate chip cookie bars. Preheat oven to 325 degrees F. Spray a 9x13-inch baking pan with nonstick cooking spray and set aside.
- 2
In a medium bowl, whisk together flour, salt, and baking soda. Set aside.
- 3
In the bowl of a stand mixer, mix the melted butter and sugars together until combined. Add the egg, egg yolk, and vanilla extract and mix until smooth. Slowly add the dry ingredients and mix on low, just until combined. Stir in the chocolate chips.
- 4
Pour cookie dough into the prepared pan, smoothing the top with the spatula. Sprinkle cookie bars very lightly with sea salt, if desired. Bake cookie bars for 25-30 minutes or until the top of the bars are light golden brown and the edges start to pull away from the pan. Remove bars from oven and cool completely.
- 5
When the cookie bars are completely cool, evenly spread the ice cream over the cookie bars. Garnish with chocolate chips.
- 6
Cover the ice cream bars and place in the freezer. Freeze until ice cream hardens, at least 2 hours. This dessert can be made in advance.
- 7
When ready to serve, remove the pan from the freezer. Run a sharp knife under hot water and cut the bars into squares. The bars will be hard to cut so make sure you get the knife super hot in between each cut. Drizzle the bars with hot fudge sauce, if desired. Serve.
- 8
Note-To soften the ice cream, let the ice cream out on a countertop for 30 minutes before using. You want it soft enough to spread over cookie bars but still slightly frozen. The ice cream bars will be hard to eat with a fork if you eat them straight from the freezer. You can let them sit for a bit or you can pick them up and eat them. They are a little messy to eat, but I promise it is worth the mess!
Nutrition (per serving)
Calorie breakdown
How this was calculated — 13 of 14 ingredients matched
Nutrition information is automatically calculated from USDA FoodData Central, so should only be used as an approximation. Actual values may vary depending on the ingredients, brands, and preparation methods used.
Open in analyzerKeyword: dessert, nutFree, summer, vegetarian
This post may contain affiliate links. Read our disclosure policy.
Share this recipe
You Might Also Like
View All →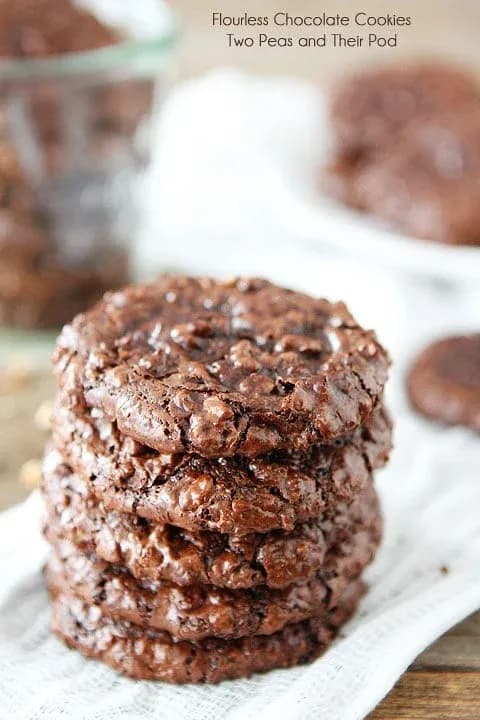


About the Author
NutriforksNutriForks is a home-cooking site built around two simple ideas: recipes should actually work, and you should know what’s in them. Every recipe pairs clear, tested instructions with a full nutrition breakdown, so healthy, everyday cooking is genuinely easy.