Cashew Coconut Granola

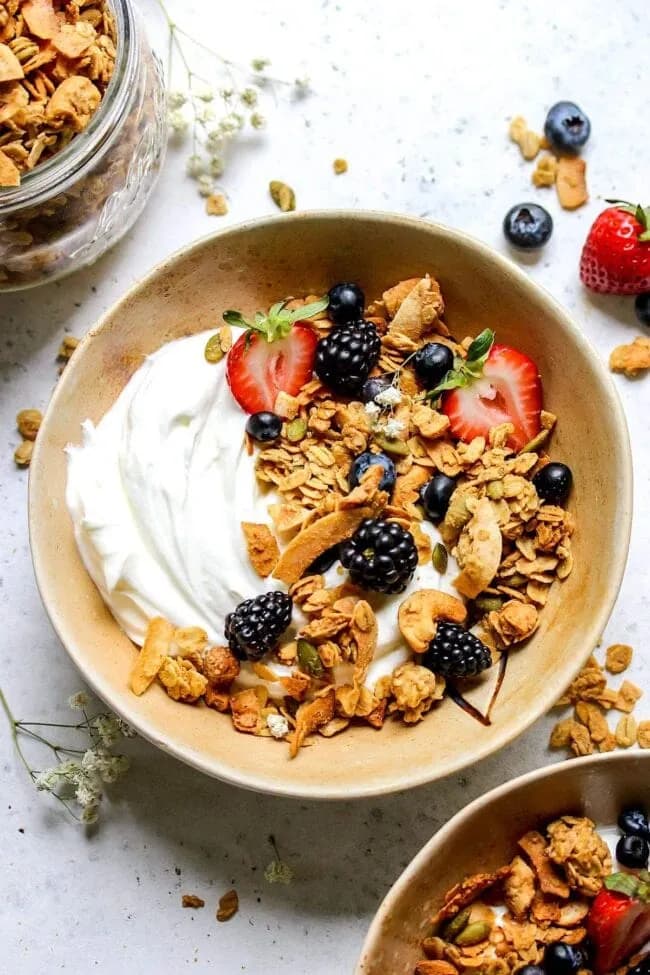
Make this easy cashew coconut granola recipe for crunchy clusters. Perfect for yogurt, acai bowls, or snacking. Get the simple steps now!
Another reason to love dairyFree: Roasted Sweet Potatoes with Agave Nectar and Fresh Rosemary or Roasted Plums with Greek Yogurt, Honey, and Almonds.
A Homemade Granola That Crunches and Satisfies
I’ve made a lot of granola over the years, but this cashew coconut combo is one I keep coming back to. The toasted coconut chips get crispy and golden, while the cashew butter coats every oat in a rich, nutty flavor. The best part? It turns into big, satisfying clusters that are perfect for snacking straight from the jar.
Why You’ll Love This Homemade Granola
- It’s a cinch to pull together, just mix dry ingredients, stir in the wet, and bake.
- The combination of cashew butter and coconut oil gives it a deep, toasty flavor that store-bought granola can’t match.
- You can easily make it gluten-free by using certified gluten-free oats.
Key Ingredients for This Coconut Cashew Granola
- Old-fashioned oats, They provide the hearty base and best texture for clusters. For a gluten-free version, use certified gluten-free oats.
- Cashew butter, It adds a creamy nuttiness that binds the granola. Stir it well before measuring because natural nut butters separate. You can substitute almond butter or peanut butter.
- Unsweetened coconut chips, These large, flat coconut pieces toast beautifully and add a chewy, tropical flavor. Shredded coconut can be used but it won’t give the same texture.
Kitchen Tools for Easy Homemade Granola
- Large rimmed baking sheet, helps spread the granola in an even layer for consistent browning.
- Silpat baking mat or parchment paper, prevents sticking and makes cleanup a breeze.
- Medium microwave-safe bowl, for melting the cashew butter and coconut oil together.
- Large mixing bowl, for combining the dry ingredients.
Tips for Perfect Crunchy Granola Clusters
For the best clusters, don’t stir the granola while it’s cooling. Let it sit on the baking sheet until completely cool, then break it into chunks. Also, make sure your cashew butter is well stirred before measuring, natural cashew butter can separate, and you want a consistent coating. If your coconut oil is solid, gently melt it before combining with the cashew butter to ensure a smooth mixture.
How to Get Big Clusters in Your Granola
For chunky clusters, press the granola down firmly on the baking sheet before baking. Don’t stir it at all during the first 20 minutes. After stirring halfway, gently press it back down again. The key is to resist the urge to break it up while it’s still warm, let it cool completely on the pan, then break it into pieces of your desired size.
Easy Swaps and Twists for Cashew Coconut Granola
If you’re out of cashew butter, almond butter or peanut butter work just as well. For a nut-free version, use sunflower seed butter and skip the cashews, adding extra pepitas or sunflower seeds instead. You can also play with the mix-ins: dried cranberries or chopped apricots stirred in after baking add a tart pop. Want it extra coconutty? Use toasted coconut flakes on top before baking.
Delicious Ways to Enjoy This Granola
Spoon it over thick Greek yogurt with fresh berries for a quick breakfast. It’s also fantastic on top of acai bowls or smoothie bowls for extra crunch. For a simple snack, grab a handful straight from the jar, I dare you to stop at one. You can even layer it with yogurt and fruit in a mason jar for a portable parfait.
How to Store Homemade Granola to Keep It Fresh
Once the granola is completely cool, transfer it to airtight jars or containers. Keep it in a cool, dry pantry for up to 1 month. A glass jar with a tight lid works perfectly, plus it looks pretty on the counter. Avoid storing it in the fridge, as moisture can make it lose its crunch.
How to Freeze Homemade Granola for Later
This granola freezes beautifully. Once it’s completely cool, transfer it to a freezer-safe bag or container, pressing out as much air as possible. It will keep for up to 3 months. No need to thaw, just scoop straight from the freezer and sprinkle over yogurt or eat as a snack.
Cashew Coconut Granola FAQs
Can I use quick oats instead of old-fashioned oats?
Quick oats will work, but the granola will be less chunky and have a finer texture. Old-fashioned oats give the best clusters and chewy texture.
What can I substitute for coconut oil?
You can use melted grapeseed oil, olive oil, or even avocado oil. The flavor will shift slightly, but the granola will still be crisp.
My granola came out too soft after baking. What went wrong?
It likely needs more time in the oven. Bake until deep golden brown, then let it cool completely on the pan. The granola firms up as it cools.
Is this granola gluten-free?
Yes, if you use certified gluten-free oats. All other ingredients are naturally gluten-free.
Recipe
Cashew Coconut Granola

This hearty, homemade granola is great with yogurt, milk, acai bowls, and more! I love keeping a jar in the pantry at all times.
Ingredients
- 3.5 cup old fashioned oats
- 1.5 cup unsweetened coconut chips
- 1 cup cashews, roughly chopped
- 0.33 cup pepitas
- 2 tbsp flaxseed meal
- 1 tsp ground cinnamon
- 0.5 tsp sea salt
- 0.5 cup cashew butter
- 0.33 cup coconut oil, melted
- 0.5 cup pure maple syrup
- 1 tsp pure vanilla extract
Instructions
- 1
Preheat the oven to 325 degrees F. Line a large rimmed baking sheet with a Silpat baking mat or parchment paper, set aside.
- 2
In a large bowl, combine the oats, coconut chips, cashews, pepitas, flaxseed meal, cinnamon, and sea salt.
- 3
In a medium, microwave-safe bowl, combine the cashew butter and melted coconut oil. Place the bowl in the microwave and heat for 20 to 30 seconds. Remove from the microwave and stir until smooth. Pour in the maple syrup and vanilla and stir until smooth.
- 4
Pour the cashew mixture over the dry ingredients and stir until well coated. Spread onto the prepared baking sheet in an even layer. Bake for 35 to 45 minutes, stirring halfway, or until the granola is golden brown.
- 5
Remove the pan from the oven and let the granola cool completely on the pan. DO NOT STIR while cooling. When cool, break into clumps and enjoy! Store in jars or containers for up to 1 month.
Nutrition (per serving)
Calorie breakdown
How this was calculated — 10 of 11 ingredients matched
Nutrition information is automatically calculated from USDA FoodData Central, so should only be used as an approximation. Actual values may vary depending on the ingredients, brands, and preparation methods used.
Open in analyzerKeyword: dairy-free, dairyFree, gluten-free-adaptable, Oven Baked, vegan, vegetarian
This post may contain affiliate links. Read our disclosure policy.
Share this recipe
You Might Also Like
View All →

About the Author
NutriforksNutriForks is a home-cooking site built around two simple ideas: recipes should actually work, and you should know what’s in them. Every recipe pairs clear, tested instructions with a full nutrition breakdown, so healthy, everyday cooking is genuinely easy.