Blackberry Scones

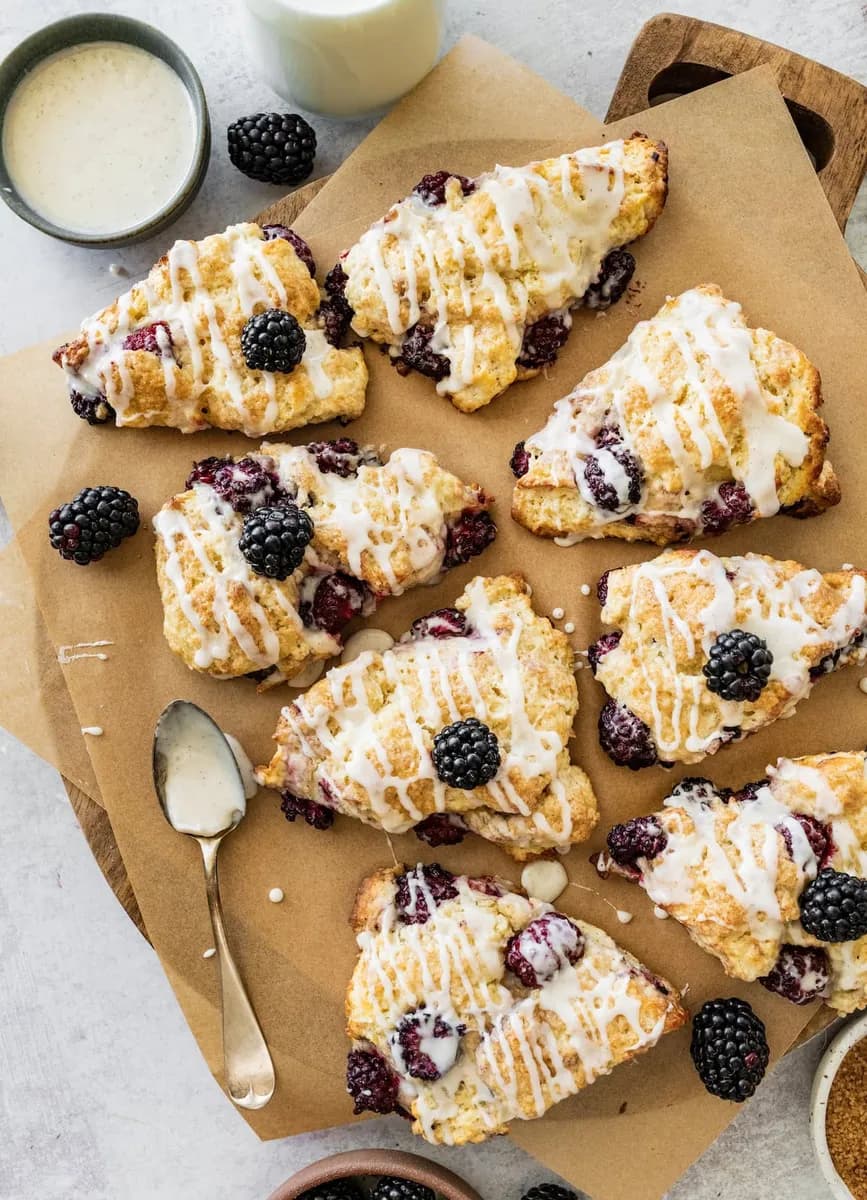
These tender blackberry scones are bursting with fresh berries and finished with a sweet vanilla glaze. Easy to make, perfect for brunch or a cozy treat.
Keep exploring with Red, White, & Blue Scones, Blueberry Scones, and Toasted Coconut Lemon Scones.
Why These Buttermilk Blackberry Scones Are My Go-To Summer Treat
I love how the tangy buttermilk keeps these blackberry scones extra tender, while the vanilla bean glaze adds just enough sweetness. Fresh blackberries burst in every bite, and the crunchy turbinado sugar on top gives a nice contrast. They’re simple enough for a weekday but pretty enough for company.
What Makes These Blackberry Scones So Good
- They use buttermilk for a moist, tender crumb that stays soft for days.
- The vanilla bean glaze is made with real vanilla paste, so you get those pretty flecks and deep flavor without any fuss.
- Freezing the shaped scones before baking keeps them from spreading, so you get tall, bakery-style triangles every time.
Key Ingredients for Tender Blackberry Scones
- Cold unsalted butter: Keep it cold for flaky layers. Cube it and chill while you prep dry ingredients.
- Buttermilk: Adds tang and moisture. If you don’t have buttermilk, mix 1/2 cup milk with 1/2 tablespoon lemon juice and let sit 5 minutes.
- Vanilla bean paste: Provides intense vanilla flavor and those signature black flecks. Pure vanilla extract works too if that’s what you have.
Kitchen Tools for Making Blackberry Scones
- Large baking sheet lined with parchment paper
- Pastry blender or your hands for cutting butter into flour
- Sharp knife for cleanly cutting dough into triangles
- Pastry brush for buttermilk wash before baking
Tips for Perfect Blackberry Scones Every Time
Start with cold butter straight from the fridge. Cut it into the flour until you have coarse crumbs with a few larger pieces, those lumps create flaky layers. When you add the wet ingredients, stir just until the dough comes together. Overmixing will make the scones tough. Fold the blackberries in gently so they don’t break apart too much. If your berries are very ripe, pop them in the freezer for 10 minutes first. Pat the dough into a 1-inch thick round and cut into 8 triangles. Freeze the shaped scones for 15 to 20 minutes before baking; this firms up the butter so the scones rise tall instead of spreading flat. Bake until the bottoms and edges are golden, around 18 to 23 minutes, then let them cool on the sheet for 5 minutes before moving to a wire rack. Wait at least 10 minutes more before drizzling the glaze so it sets properly.
Blackberry Scone Variations to Try
If fresh blackberries aren’t available, frozen ones work fine, don’t thaw them first, just fold them in frozen to minimize color bleed. Swap the blackberries for raspberries or blueberries for a different berry twist. For a dairy-free version, use cold coconut oil instead of butter and a plant-based buttermilk (like almond milk with a splash of lemon juice). You can also skip the glaze and dust the baked scones with powdered sugar for a lighter finish.
How to Serve Fresh Blackberry Scones
These scones are great on their own with coffee or tea, but you can dress them up. Spoon some extra fresh blackberries on the side and a dollop of whipped cream or vanilla ice cream for dessert. They also work as a shortcake base, split them open and layer with berries and cream.
Storing Leftover Blackberry Scones
Keep leftover scones in an airtight container at room temperature for up to 2 days. If you need to store them longer, wrap each scone individually in plastic wrap and refrigerate for up to 5 days. The glaze may soften the scones over time, so store unglazed scones and glaze them just before serving when possible.
How to Freeze Blackberry Scones for Later
To freeze unbaked scones, place the shaped triangles on a parchment-lined baking sheet and freeze until firm, about 1 hour. Transfer them to a freezer-safe bag and bake directly from frozen, adding 2-3 minutes to the baking time. For baked scones, cool completely, wrap individually, and freeze in a bag for up to 3 months. Thaw at room temperature and reheat in a 350°F oven for 5-10 minutes to refresh.
Best Way to Reheat Leftover Scones
The best way to reheat leftover scones is in a 350°F oven for about 5 minutes. This restores the crispy exterior without drying out the inside. If you’re in a rush, a microwave will work but the scones will be softer. Avoid reheating glazed scones at high heat because the glaze can melt.
Frequently Asked Questions About Blackberry Scones
Why do my scones spread too much?
Freezing the shaped scones for 15-20 minutes before baking is essential. Also, make sure your butter is cold and your oven is preheated to 400°F.
Can I use frozen blackberries?
Yes. Do not thaw them; fold them in frozen to prevent excess moisture from making the dough sticky.
What if I don’t have buttermilk?
Add 1/2 tablespoon of lemon juice or white vinegar to 1/2 cup of milk and let it sit for 5 minutes. It won’t be as thick, but it works.
How do I know when the scones are done?
They should be golden brown on the bottom and around the edges. The tops will be set but not necessarily dark. Overbaking dries them out.
Can I make the scones gluten-free?
You can try a 1:1 gluten-free flour blend, but scones will be more delicate. Add an extra tablespoon of buttermilk if the dough seems dry.
Recipe
Blackberry Scones
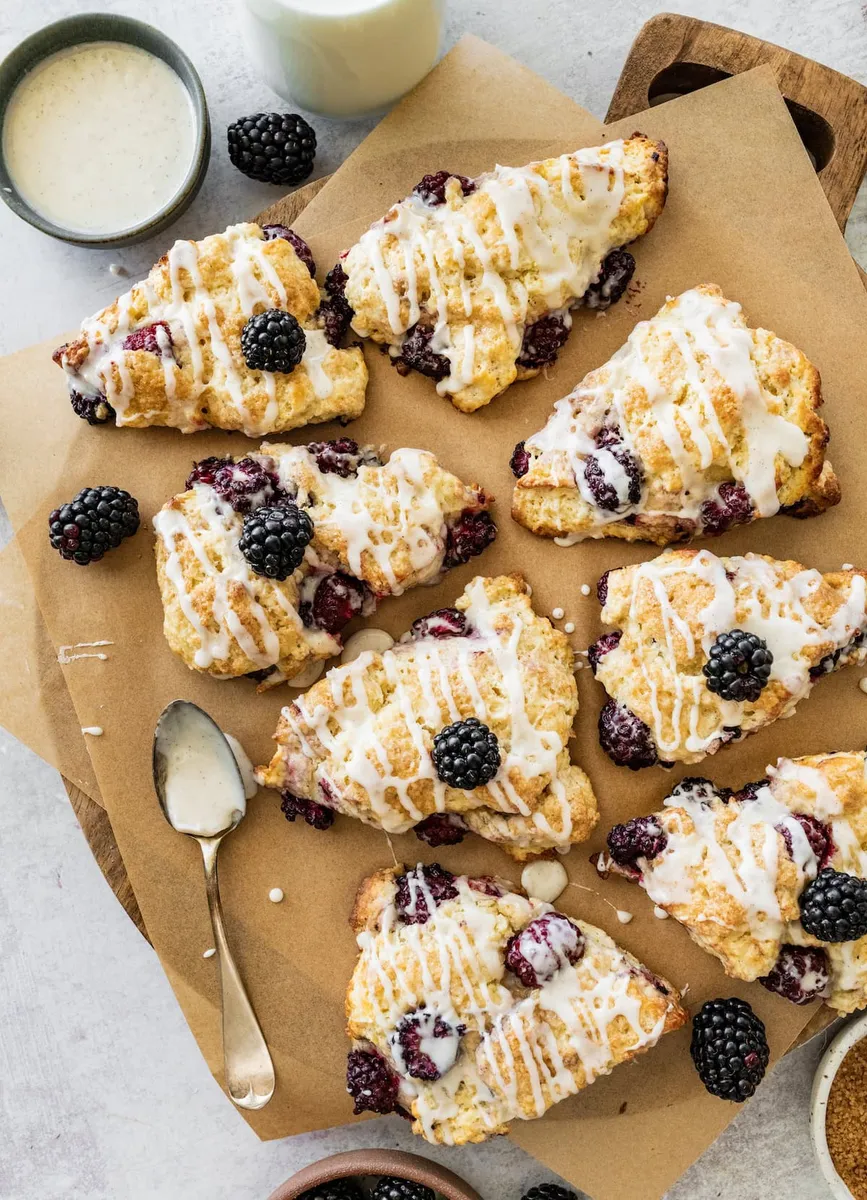
These tender blackberry scones are bursting with fresh berries and finished with a rich vanilla bean glaze. Easy to make and perfect for any morning!
Ingredients
- 2 cup all-purpose flour
- 0.333 cup granulated sugar
- 1 tbsp baking powder
- 0.5 tsp kosher salt
- 6 tbsp cold unsalted butter, cut into small cubes
- 0.5 cup cold buttermilk, plus more for brushing the tops
- 1 egg, large
- 1 tsp vanilla bean paste or pure vanilla extract
- 1.25 cup blackberries
- 2 tbsp turbinado sugar, for sprinkling on scones
glaze
- 1 cup confectioner's sugar
- 2 tbsp whole milk
- 0.5 tsp vanilla bean paste or pure vanilla extract
Instructions
- 1
Preheat oven to 400 degrees F. Line a large baking sheet with parchment paper. Set aside.
- 2
In a large bowl, whisk together the flour, sugar, baking powder, and salt.
- 3
Using a pastry blender or your hands, quickly cut the cold butter into the flour mixture. Mix until mixture resembles coarse meal, with a few larger butter lumps.
- 4
In a small bowl, whisk together 1/2 cup buttermilk, egg, and vanilla extract. Pour the liquid ingredients over the flour mixture and stir with a spatula until dough begins to form. Don’t over mix.
- 5
Gently fold in the blackberries.
- 6
Transfer dough to a floured countertop and gently push the dough together with your hands, just until it forms a ball. Form the dough into a circle by patting the dough and gently pressing the dough. You want the scones to be about 1-inch thick. Don’t overwork the dough. You want to work quickly so the butter doesn’t get too warm. Use a sharp knife to cut the scones into 8 triangles.
- 7
Place scones on prepared baking sheet and put in the freezer for 15 to 20 minutes. This will prevent the scones from spreading when baking. Remove the scones from the freezer. Use a pastry brush to brush the tops of the scones with the additional buttermilk. Sprinkle the scones with turbinado sugar.
- 8
Bake for 18 to 23 minutes, or until scones are golden brown on the bottom and around the edges. Let the scones cool on the baking sheet for 5 minutes and then transfer to a wire cooling rack.
- 9
While the scones are cooling, make the glaze. In a small bowl, whisk the confectioners’ sugar, heavy cream (or milk), and vanilla extract together.
- 10
Drizzle the glaze over the scones. Enjoy!
Nutrition (per serving)
Calorie breakdown
How this was calculated — 13 of 13 ingredients matched
Nutrition information is automatically calculated from USDA FoodData Central, so should only be used as an approximation. Actual values may vary depending on the ingredients, brands, and preparation methods used.
Open in analyzerKeyword: american, breakfast, nutFree, Oven Baked, vegetarian
This post may contain affiliate links. Read our disclosure policy.
Share this recipe
You Might Also Like
View All →



About the Author
NutriforksNutriForks is a home-cooking site built around two simple ideas: recipes should actually work, and you should know what’s in them. Every recipe pairs clear, tested instructions with a full nutrition breakdown, so healthy, everyday cooking is genuinely easy.