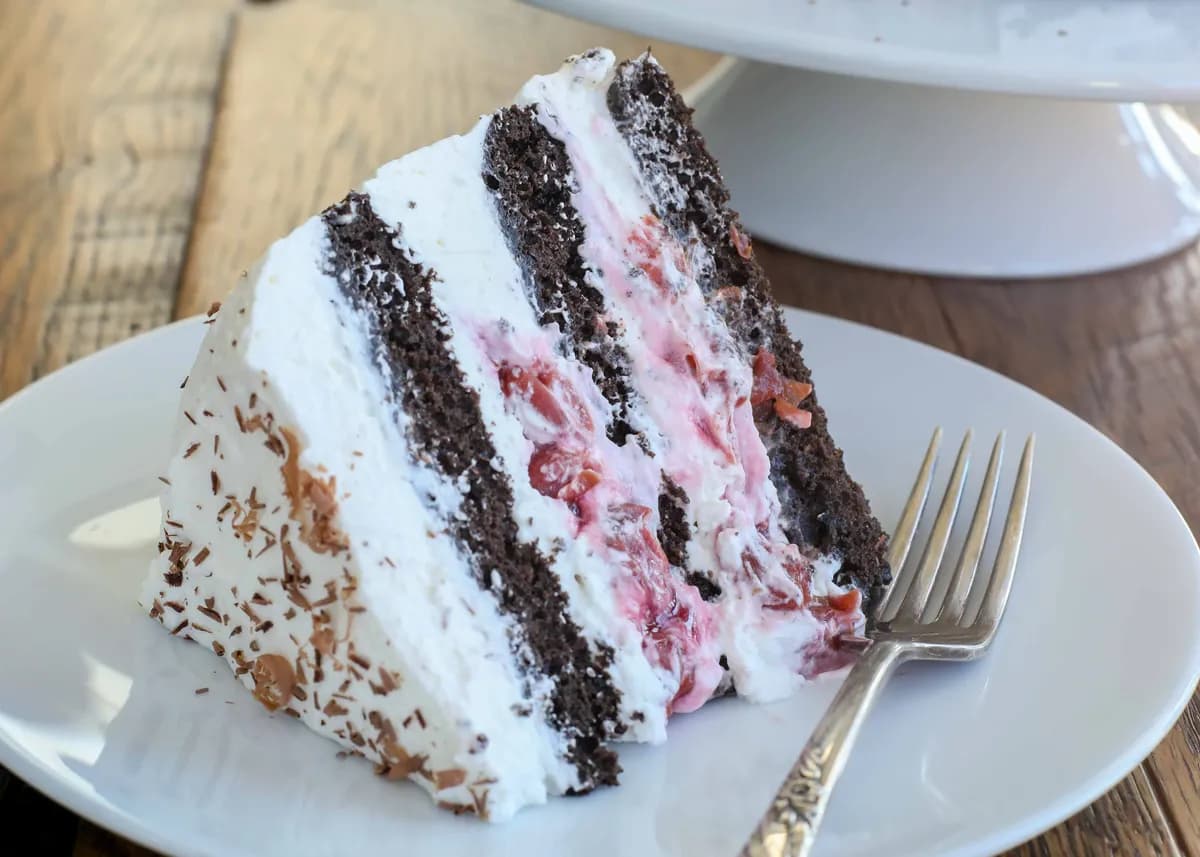

Make the best Black Forest Cake with tart cherries, rich chocolate, and whipped cream. Expert tips for perfect layers and cherry syrup filling. Get the recipe!
Key Ingredients for This Chocolate Cake with Cherries
Kirsch: This clear cherry brandy is the traditional flavor backbone of a Black Forest cake. It adds a subtle, fruity warmth that plain cherry juice can’t replicate. If you can’t find it, use a good-quality cherry juice and a splash of vanilla extract. Dutch-process cocoa: I strongly recommend it over natural cocoa here. Dutch-process is treated with alkali, which neutralizes its acidity and gives the cake a darker color and a smoother, more mellow chocolate taste—perfect alongside the tart cherries and sweet cream. Canned red tart cherries in water: Look for cans labeled “tart cherries” or “sour cherries,” not sweet pie filling. Drain them but reserve the liquid—that’s the base of your cherry syrup filling. The tartness is essential to balance the richness of the cake and cream.
Equipment You’ll Need
Three 8- or 9-inch round cake pans (the thin layers need even baking, so same-size pans are key). Electric mixer (stand or hand) for beating the butter-sugar mixture and whipping the cream. Pastry brush for brushing the cherry syrup onto the cake layers. Slotted spoon to transfer the cherries without extra liquid. Wax paper or parchment to line the pan bottoms. Wire cooling racks for cooling the cakes completely.
Tips for a Perfect Homemade Black Forest Cake
I’ll never forget the first time I made this cake—I was so excited to layer it all together, only to realize I’d overbaked the thin chocolate layers by just two minutes. They crumbled like dry leaves. So here’s my hard-earned advice: set a timer and check at 15 minutes. Those thin layers go from perfect to parched fast. Also, if you’re not a fan of kirsch (or can’t find it), swap in an equal amount of cherry juice mixed with a teaspoon of vanilla extract—it’s still a gorgeous chocolate cake with cherries. And please, let the cherry syrup filling cool completely before you start layering; warm syrup will melt your whipped cream into a puddle.
Expert Tips for the Best Cherry Syrup Filling
The cherry syrup filling is the soul of this Black Forest cherry cake, and getting it right is all about the cornstarch slurry. Whisk the cornstarch with cold cherry water until absolutely smooth—any lumps will turn into starchy clumps in the hot syrup. When you add the slurry to the simmering liquid, stir constantly and don’t walk away. You’re looking for a glossy, spoon-coating thickness that happens in about 90 seconds. Overcook it and you’ll get a gummy mess; undercook and the cherries will swim in thin juice. Also, use Dutch-process cocoa for the cake—its alkalinity gives a deeper, more mellow chocolate flavor that stands up to the tart cherries and sweet cream.
How to Serve This Whipped Cream Cake
This cake is a showstopper on its own, but a few finishing touches make it even more irresistible. Pile on shaved dark chocolate curls and a handful of fresh, pitted cherries right before serving—the contrast of glossy fruit and dark chocolate against the white cream is pure drama. For a little extra indulgence, dollop a spoonful of the leftover cherry syrup around each slice. As for drinks, a strong black coffee cuts through the sweetness beautifully, or pour a glass of cold milk if you’re serving it to kids. It’s the kind of whipped cream cake that begs to be the centerpiece of a birthday or holiday table.
Storing Your Black Forest Cherry Cake
Keep this cake in the refrigerator, covered tightly with plastic wrap or in an airtight cake carrier. It will stay fresh for up to three days, though the whipped cream may soften slightly over time—that’s fine, it still tastes incredible. Do not leave it at room temperature for more than an hour, because the cream and cherry filling are both perishable. And please, don’t try to freeze the assembled cake; the whipped cream will separate and turn watery when thawed. If you want to get ahead, freeze the unassembled cake layers (see the freezing section) and assemble fresh.
Can You Freeze This Homemade Black Forest Cake?
Freezing the fully assembled cake isn’t a great idea—whipped cream doesn’t survive the freezer gracefully. But you can absolutely freeze the chocolate cake layers on their own. Once they’re completely cool, wrap each layer tightly in plastic wrap, then foil, and freeze for up to two months. When you’re ready to build your Black Forest cake, thaw the layers in the refrigerator overnight, then proceed with the cherry syrup filling and fresh whipped cream. This way you get the convenience of make-ahead without sacrificing that luscious, airy texture.
Frequently Asked Questions
Can I use fresh cherries instead of canned?
Yes, but you’ll need to adjust the syrup. Use about 2 cups of pitted fresh tart cherries (like Morello) and simmer them with 1/2 cup water, 1/3 cup sugar, and 1 tablespoon kirsch. Then proceed with the cornstarch slurry as written. The fresh cherries will be firmer and less sweet than canned, so taste and add more sugar if needed.
What can I substitute for kirsch in this German chocolate cake?
Kirsch (cherry brandy) adds a subtle boozy note, but you can replace it with an equal amount of cherry juice plus 1/2 teaspoon of vanilla extract. For an alcohol-free version, use cherry juice and a drop of almond extract—it mimics that cherry-pit flavor beautifully.
Why did my cake layers stick to the pans?
This recipe uses butter and parchment circles, which usually works perfectly. If your layers stuck, you may have skipped the parchment or not greased the sides well enough. Also, let the cakes cool in the pans for the full 20 minutes before inverting—they need that time to set. If they still stick, run a thin knife around the edge before turning out.
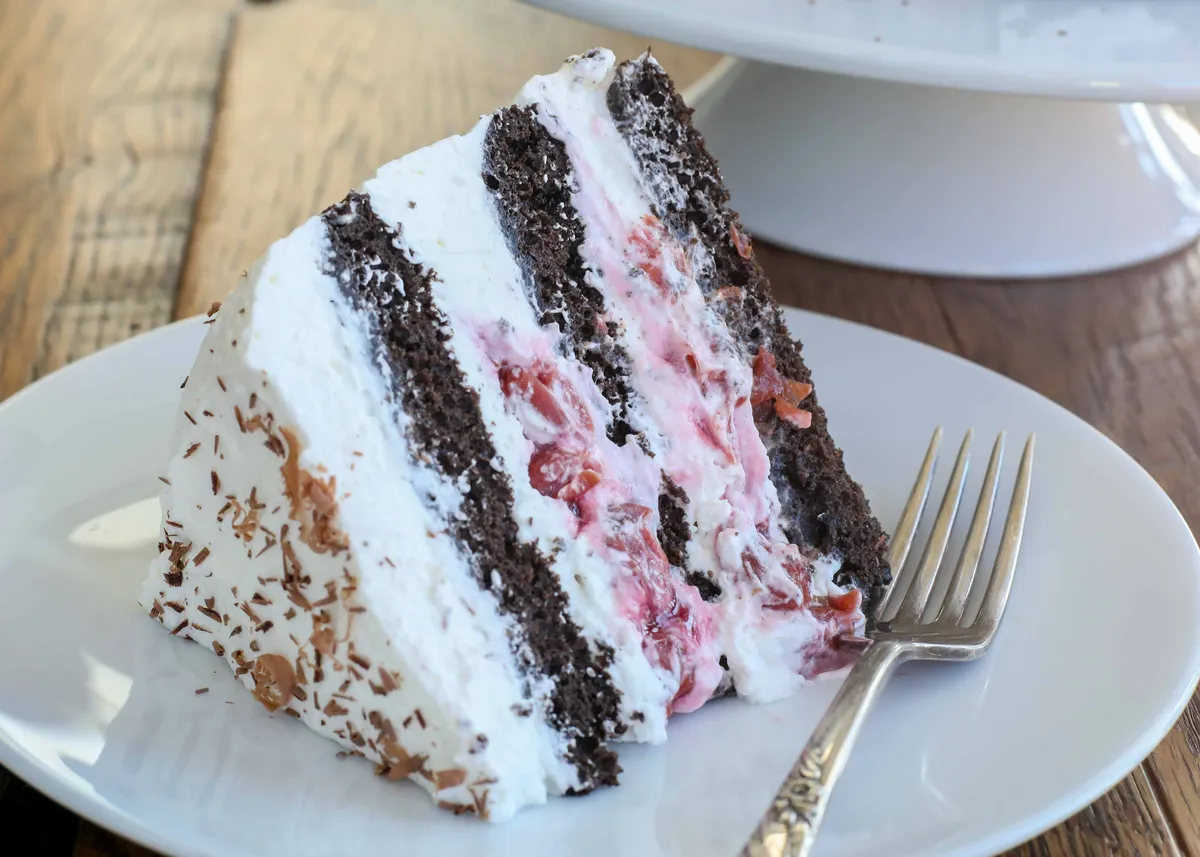
Black Forest Cake
Ingredients
- 1 tbsp cornstarch
- 0.5 cup liquid from the can of sour cherries
- 0.25 cup kirsch liqueur
- 0.33 cup sugar
- 14.5 oz canned red tart cherries in water drained with liquids reserved
- 1 cup sugar
- 0.33 cup butter room temperature
- 6 eggs
- 1 tsp vanilla extract
- 1.25 cup all-purpose flour
- 0.5 cup dutch-process cocoa powder
- 2 tsp baking powder
- 0.5 tsp kosher salt
- 3 cup heavy whipping cream
- 0.25 cup powdered sugar
Equipment
- medium saucepan
- electric mixer
- 3 round cake pans (8 or 9-inch)
- wax paper or parchment
- pastry brush
- slotted spoon
- cake stand
- wire racks
- large mixing bowl
- whisk attachment
Instructions
- In a medium-size saucepan, combine 1/4 cup of the reserved cherry water, kirsch, and sugar. Bring to a simmer, while stirring frequently. While heating the mixture, combine the cornstarch and the remaining 1/4 cup of cherry water in a small glass or bowl. Whisk until smooth. Set aside.
- When the liquids on the stove are simmering and the sugar has dissolved, stir in the cornstarch mixture and continue simmering while stirring constantly. Cook 1-2 minutes, until the liquid has thickened and coats the spoon.
- Remove the pan from the heat and add the drained cherries. Stir to coat the cherries and set aside to cool completely.
- Preheat the oven to 325°F. Generously grease the bottom and sides of (3) 8 or 9-inch round pans with butter. Trace the bottom of the pans onto wax paper or parchment with a pencil and then cut out the circles. Place the paper in the bottom of each pan.
- In a large mixing bowl, combine the sugar and butter and beat with an electric mixer until smooth and fluffy. Add the eggs, 2 at a time, mixing in between each addition. Add the vanilla extract and beat until creamy and smooth.
- In a separate bowl, whisk together the flour, cocoa, baking powder, and salt. Gradually add the dry ingredients to the mixing bowl and beat to combine. Divide the cake batter between the prepared pans as evenly as possible. (These should be very thin layers.)
- Bake for 15-16 minutes, until a toothpick inserted in the center of the cake comes out clean. Take care not to overbake or these thin layers of cake will be dry. Remove from the oven and let the cakes cool in the pans for 20 minutes. Invert the cakes onto wire racks and allow them to cool completely.
- In a large mixing bowl, beat the cream with the whisk attachment of an electric mixer until soft peaks form. Add the powdered sugar and continue beating until stiff peaks form.
- Place a layer of the cake on a cake stand and use a pastry brush to brush lightly with the syrup from the cherry mixture, about 2 tablespoons worth of syrup.
- Scoop about 1 cup of whipped cream onto the cake layer. Spread the whipped cream across the cake, leaving a ring of extra whipped cream at the edges. (This creates a barrier to prevent the cherry filling from dripping down the sides of the cake.)
- Use a slotted spoon to transfer half of the cherries (without any extra liquid) over the whipped cream. Spoon an additional cup of whipped cream over the cherries and gently spread to cover the cherries. Place the second layer of cake over the whipped cream and repeat this process.
- Place the last layer of cake on top and lightly brush with syrup. Top with the remaining whipped cream (about 2 cups worth). Spread the whipped cream over the top and sides of the cake. Refrigerate for at least 4 hours before serving.
- Before serving, top with shaved chocolate and/or fresh cherries, if desired. Store in an airtight container in the refrigerator for 2-3 days. Enjoy!
Share this recipe
You Might Also Like
Brownie Ice Cream
Brown Sugar Pound Cake
Brown Butter White Chocolate Candied Pecan Cookies
Brown Butter Pumpkin Snickerdoodles
Brown Butter Oatmeal Cookies with Pecans, Dates & Dark Chocolate Chunks

Brown Butter Caramel Oatmeal Cookies

About the Author
admin